Setting Up the Environment
Create .env, deploy to Vercel first, then wire up every service and sync back.
Last updated:
Rename env.example to .env
Before doing anything else, rename the env.example file to .env. This file will hold all of the local environment variables the application needs in order to run.
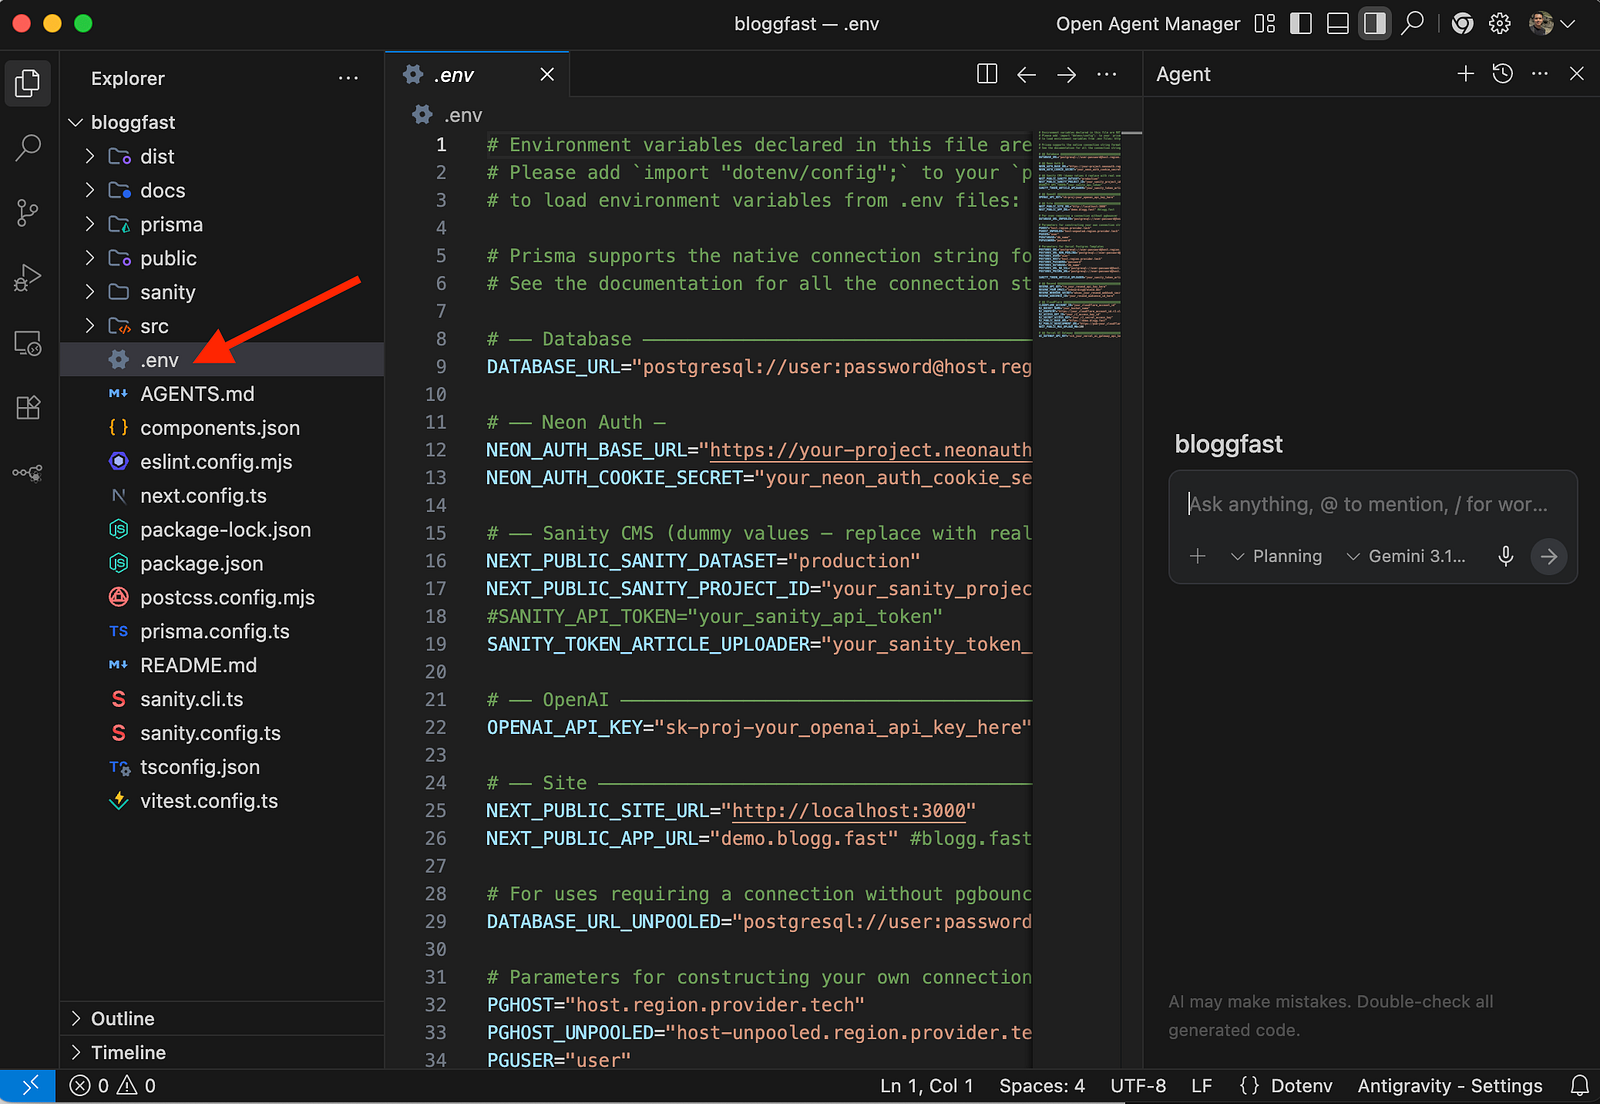
Next, open a terminal in the root of the project and install the dependencies:
npm installThis command downloads all the required packages defined in package.json and creates a node_modules folder in the project root. Depending on your internet speed and machine, this may take a minute or two.
Once the installation finishes successfully, the application is ready for configuration. At this stage, the main goal is to replace the placeholder values in .env with real credentials and service configuration values. BloggFast uses multiple services that work together to power the application, including:
- Database
- Authentication
- Sanity CMS
- Resend email delivery
- Cloudflare R2 storage
- Vercel AI Gateway
Push to GitHub and import into Vercel
Before filling in those values, it is a good idea to connect the project to a remote Git repository and import it into Vercel. This makes the environment setup easier to manage and lets you validate the deployment configuration early.
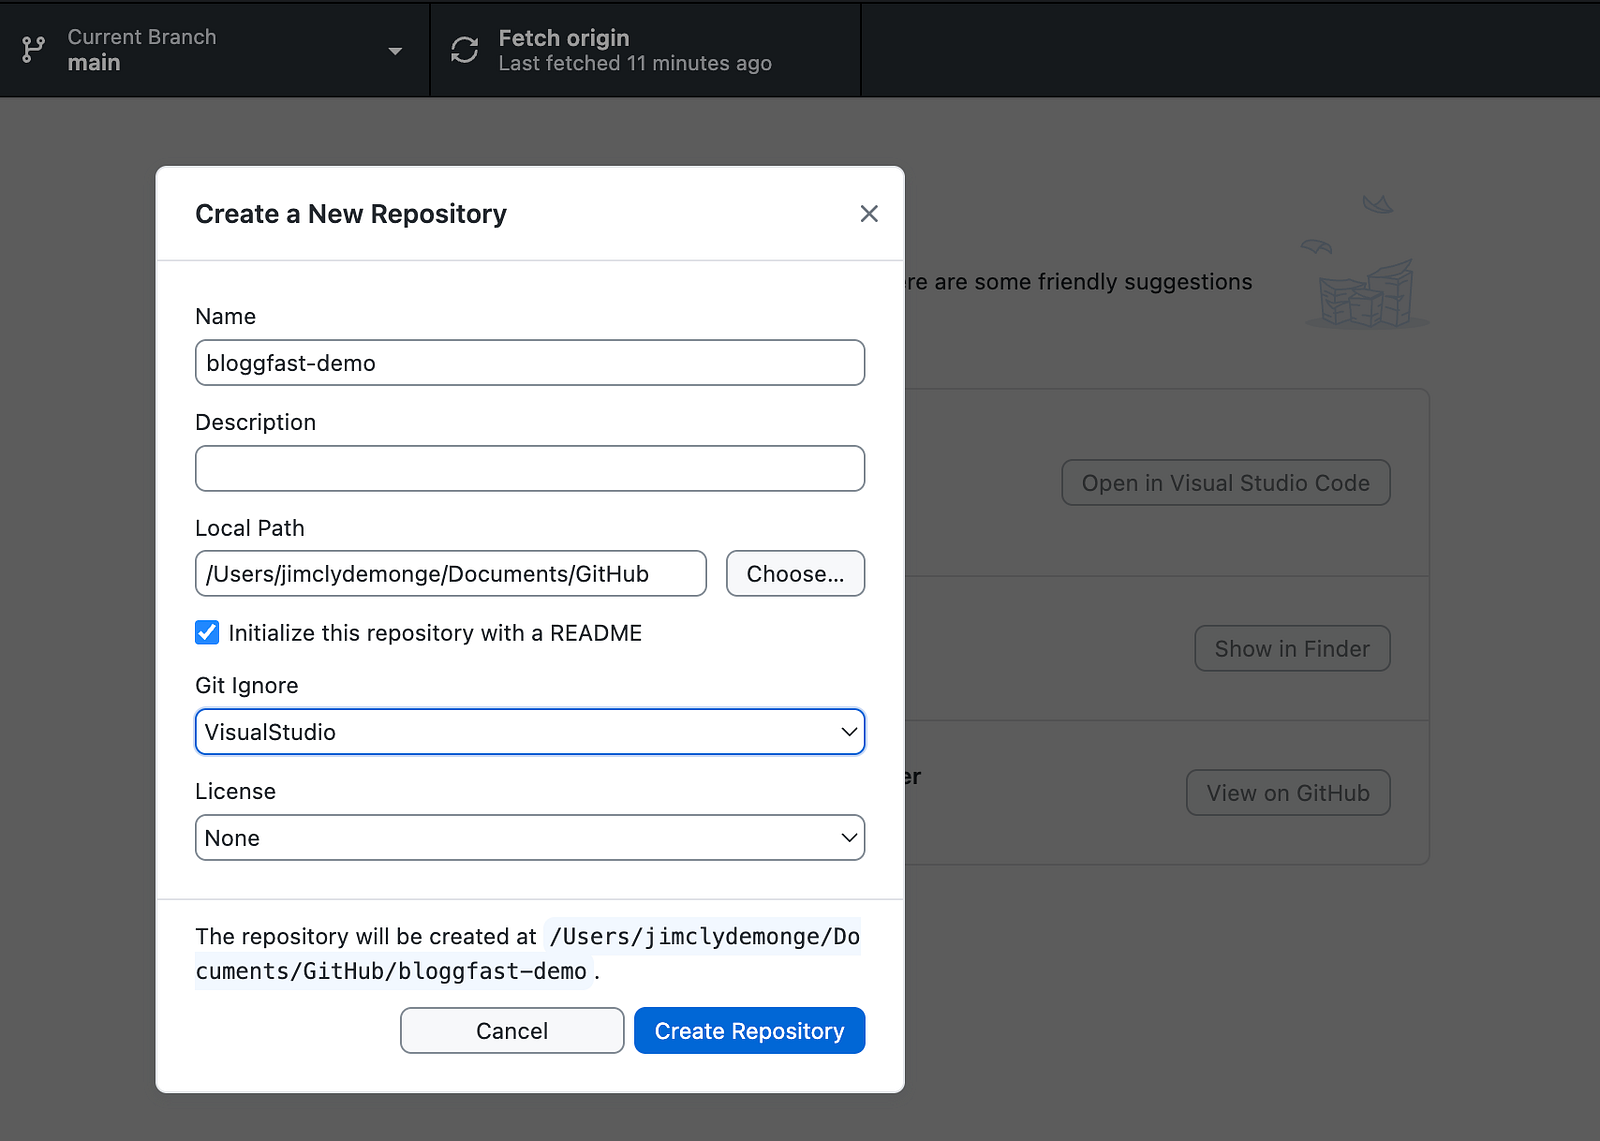
If you are using GitHub Desktop, create a new private repository for the project and push the local source code to GitHub.
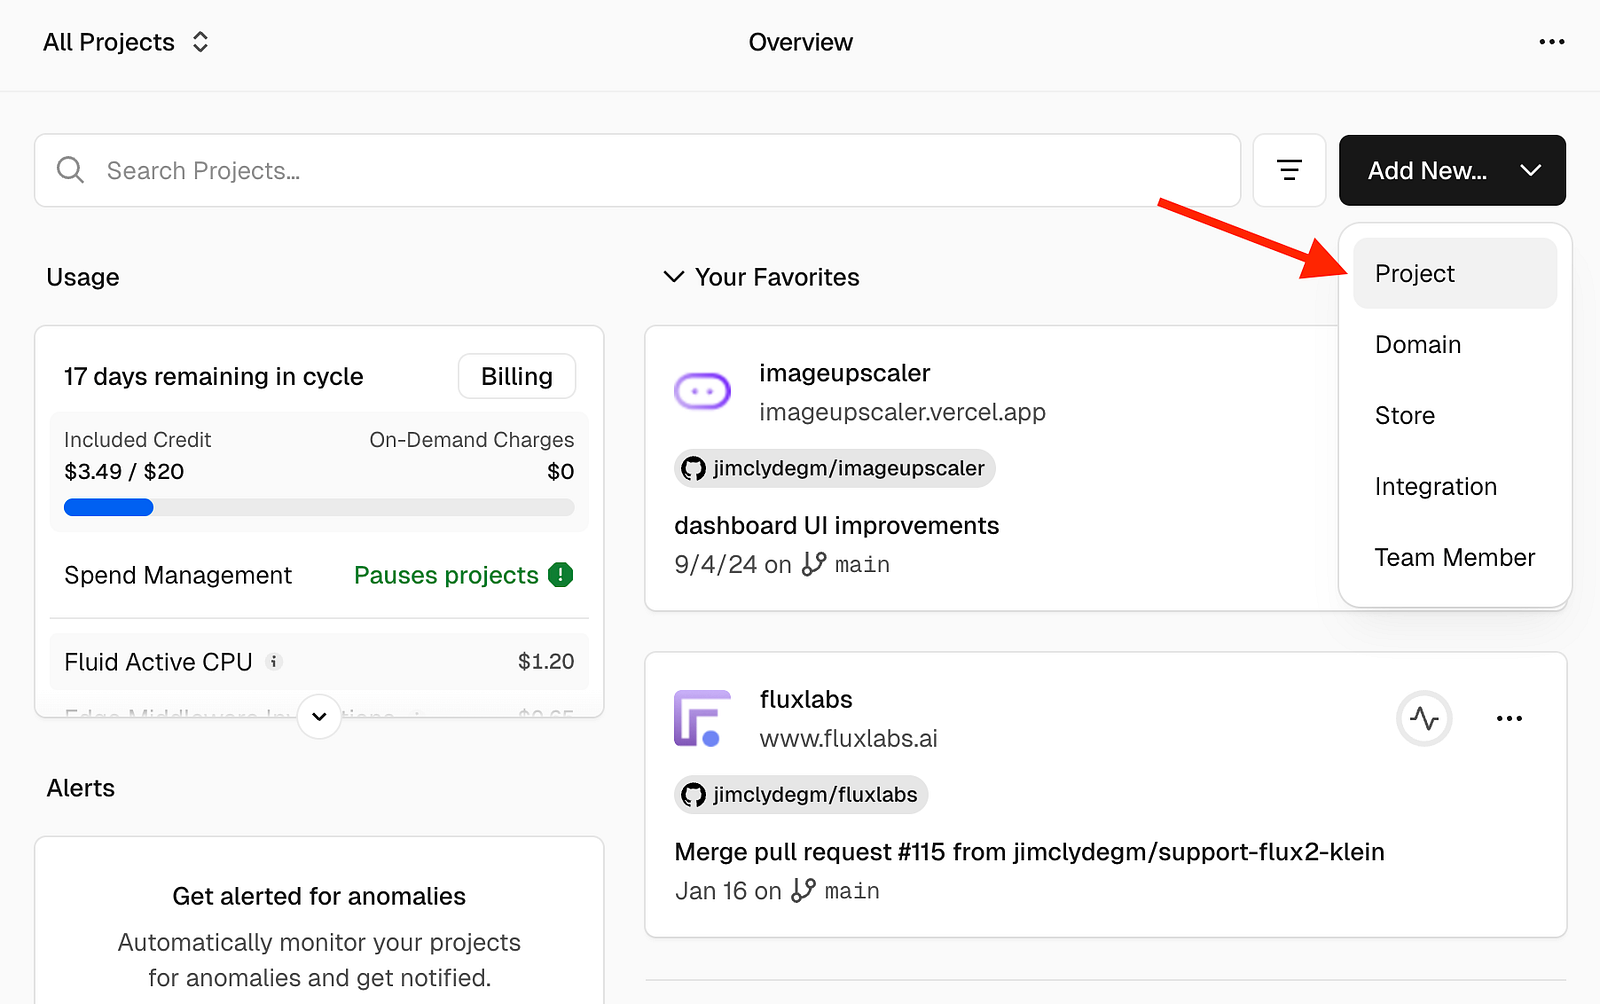
Once the upload is complete, go to Vercel, create a new project, and import the repository. Depending on your account settings, you may need to grant Vercel access to the repository. Follow the prompts shown in the Vercel dashboard.
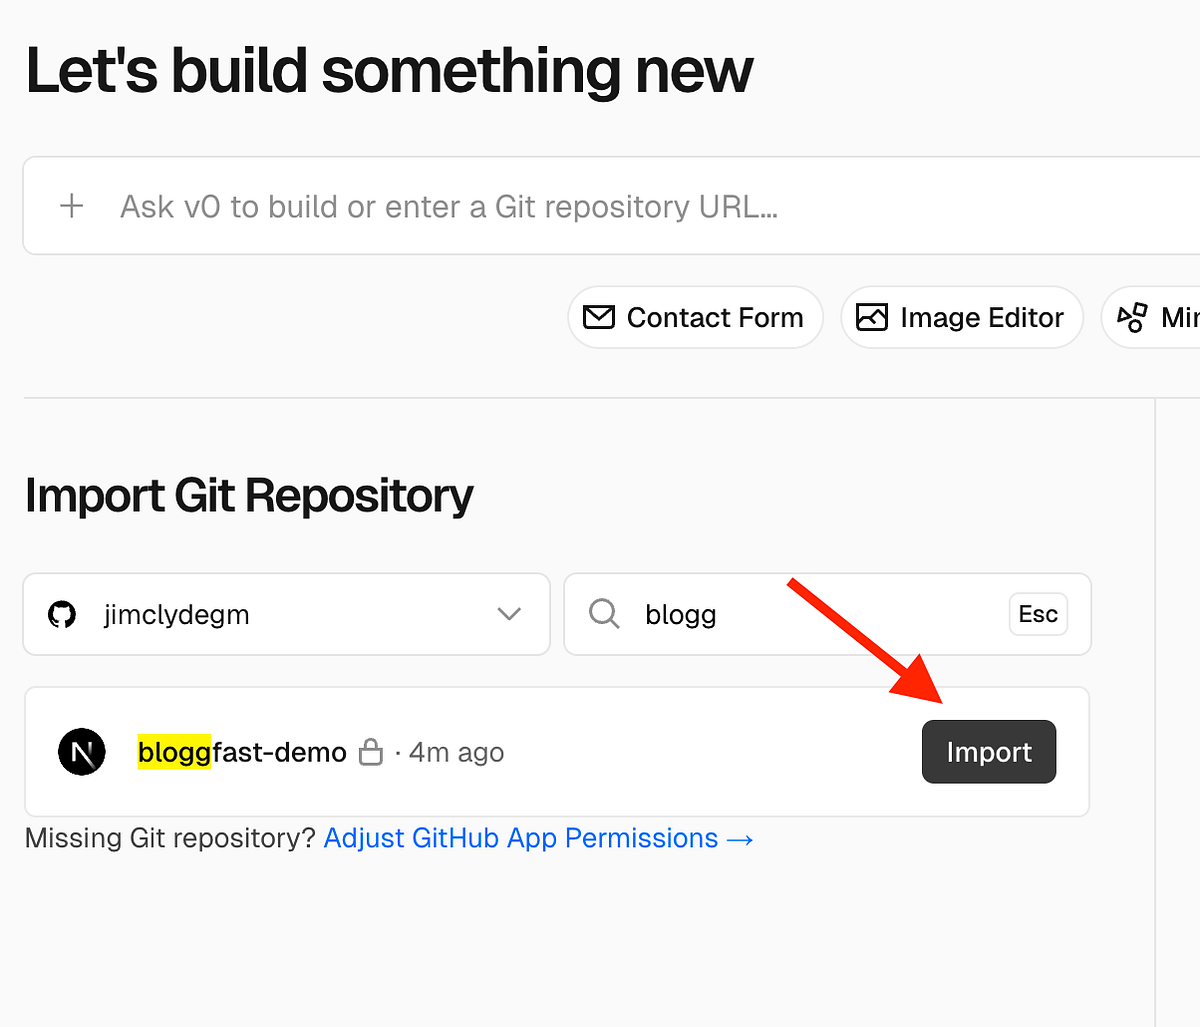
Click on the import button to start the import of the project.
At this point, you can start an initial deployment.
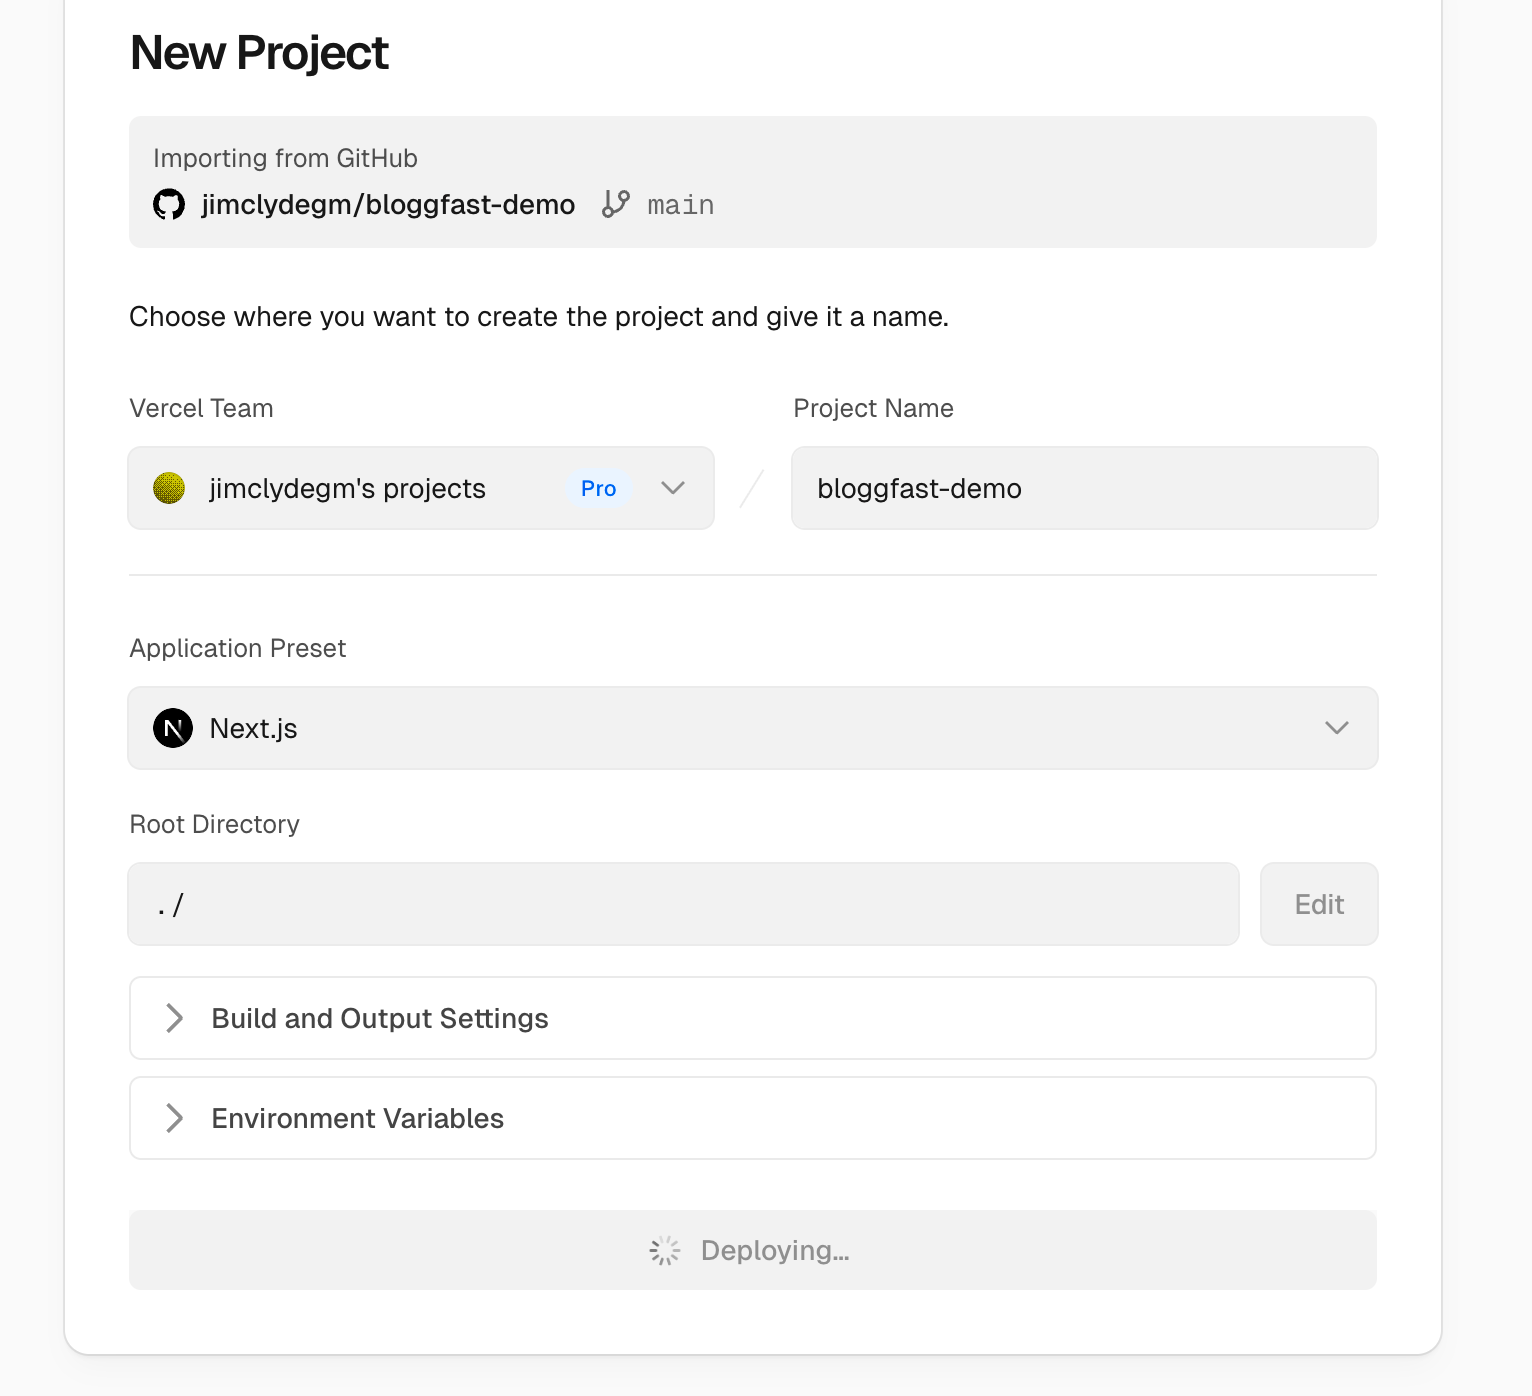
The build is expected to fail because the environment variables still contain placeholder values, and that is completely normal. The purpose of this first deployment is simply to connect the project to Vercel and prepare the service integrations.
Services to wire up
You'll be creating credentials for seven integrations:
- Neon Postgres — primary database
- Neon Auth — authentication
- Vercel AI Gateway — unified AI model access
- Resend — transactional email
- Cloudflare R2 — media storage
- Sanity — optional rich-text CMS
- Site URLs — local and production URLs
Neon Postgres (via Vercel Storage)
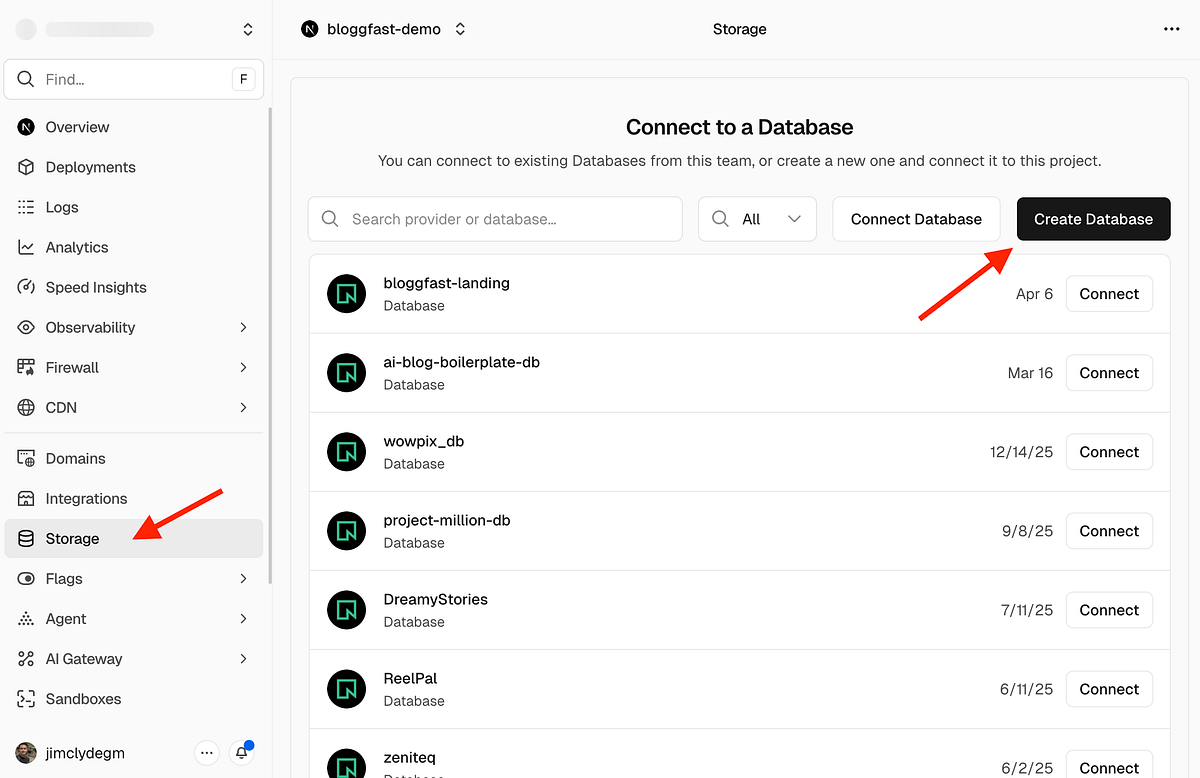
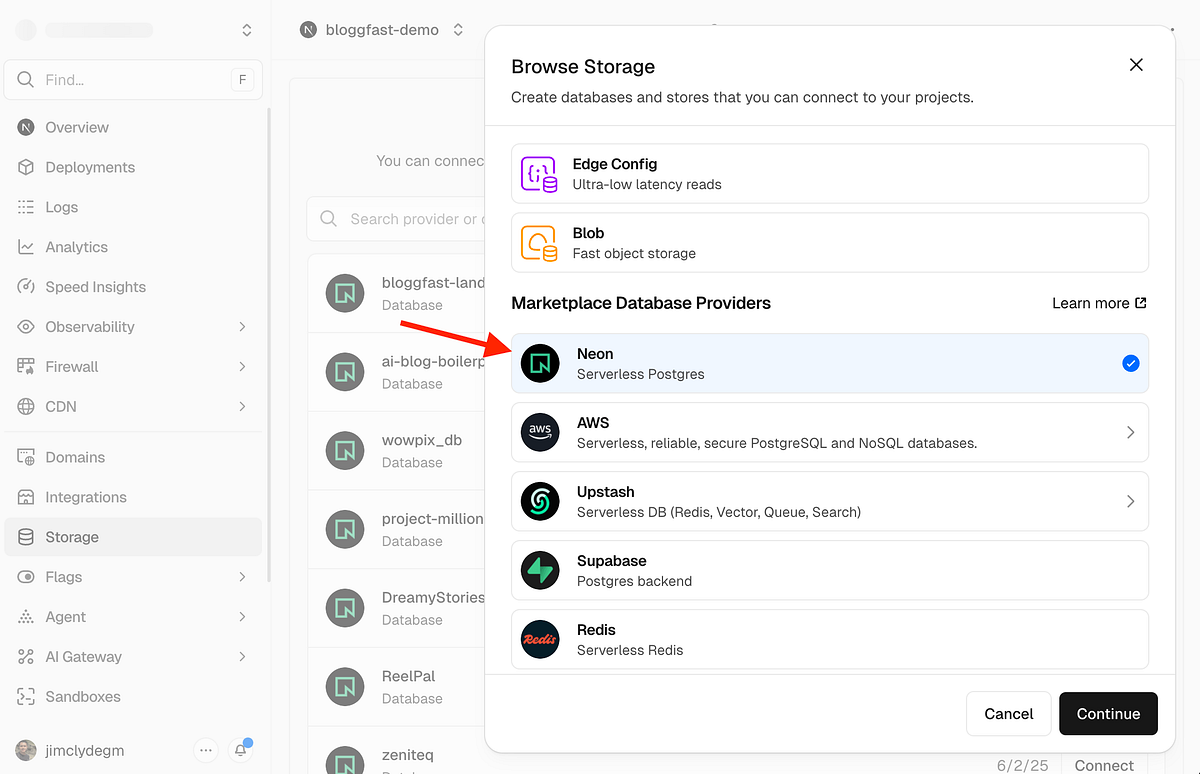
To configure the database, open your Vercel project dashboard and go to the Storage tab. Click Create Database. For this project, use Neon as the database provider.
Click on the continue button.
During setup, make sure to enable Auth. This is important because Neon Auth is used to manage application users and keep authentication data connected to the Postgres database.
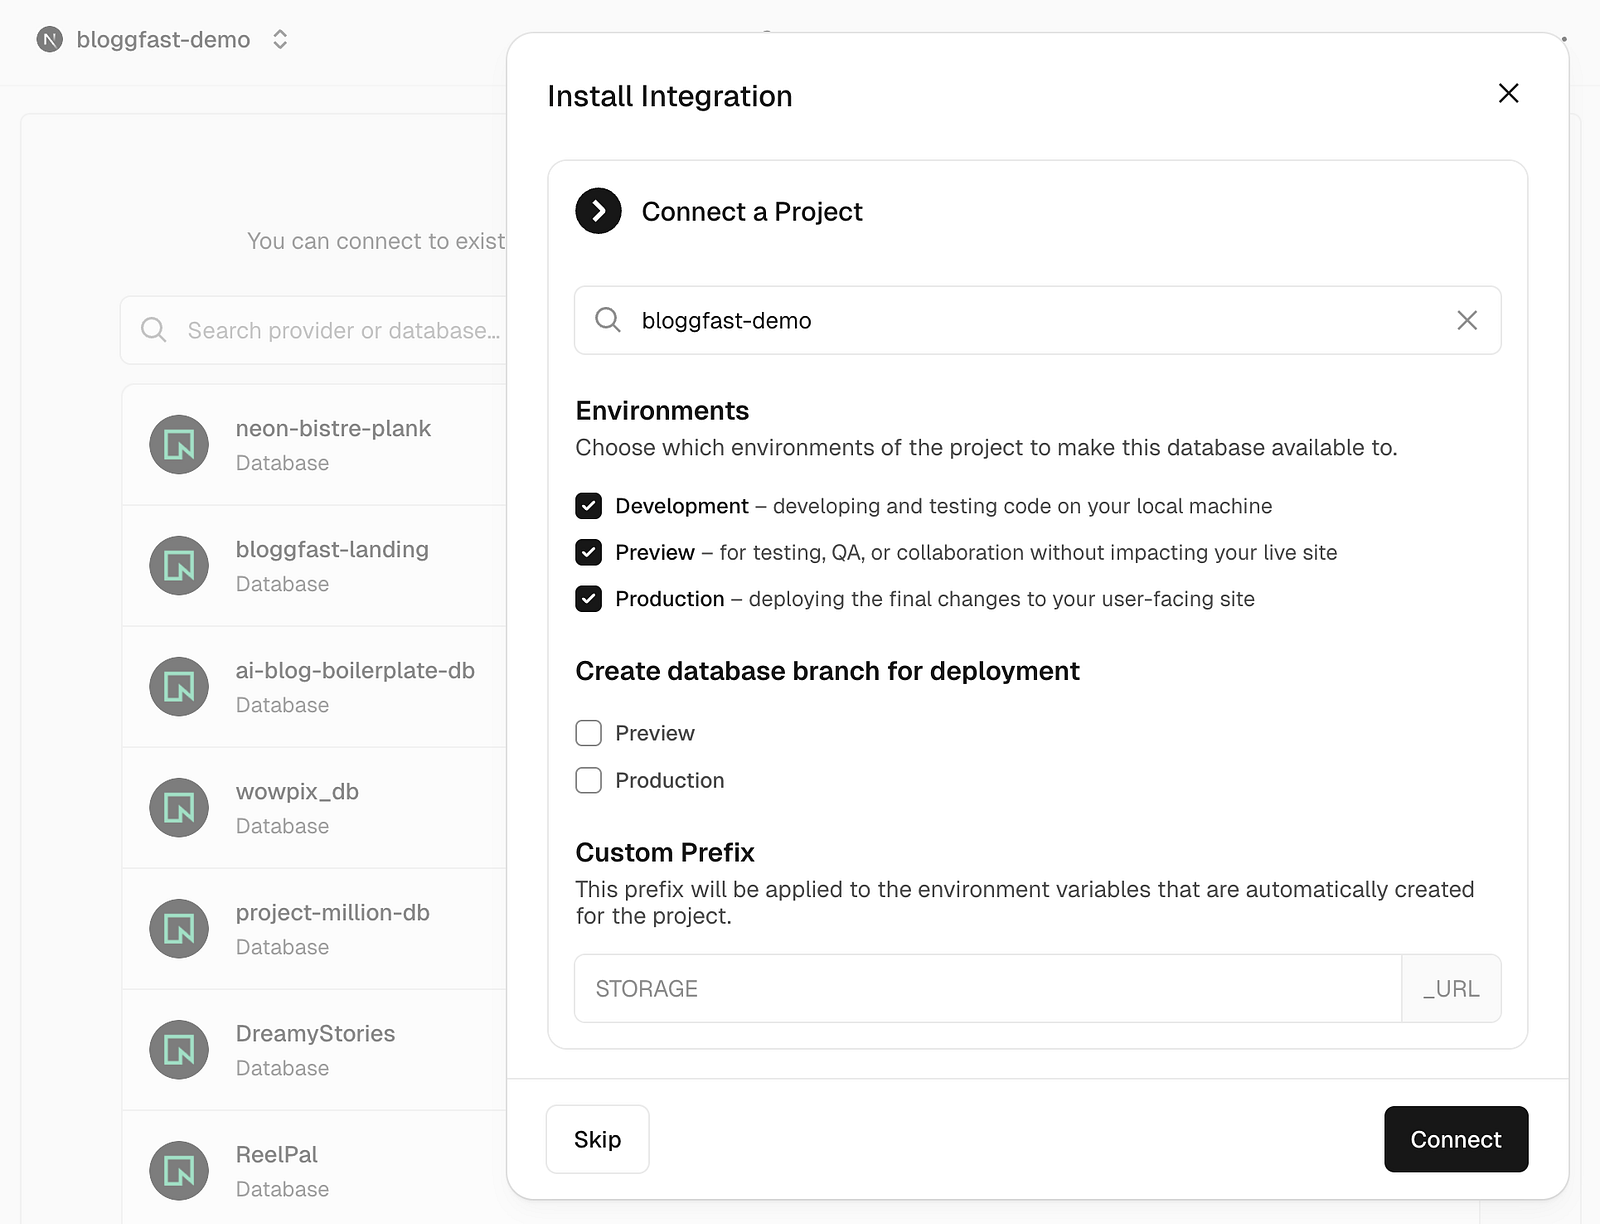
When choosing environments, make the database available to all three:
- Development for local work
- Preview for test deployments
- Production for the live application
Once the database is created successfully, you will be redirected to the Neon dashboard. Neon provides several database-related environment variables, including DATABASE_URL, pooled and unpooled connection strings, and Postgres-specific values.
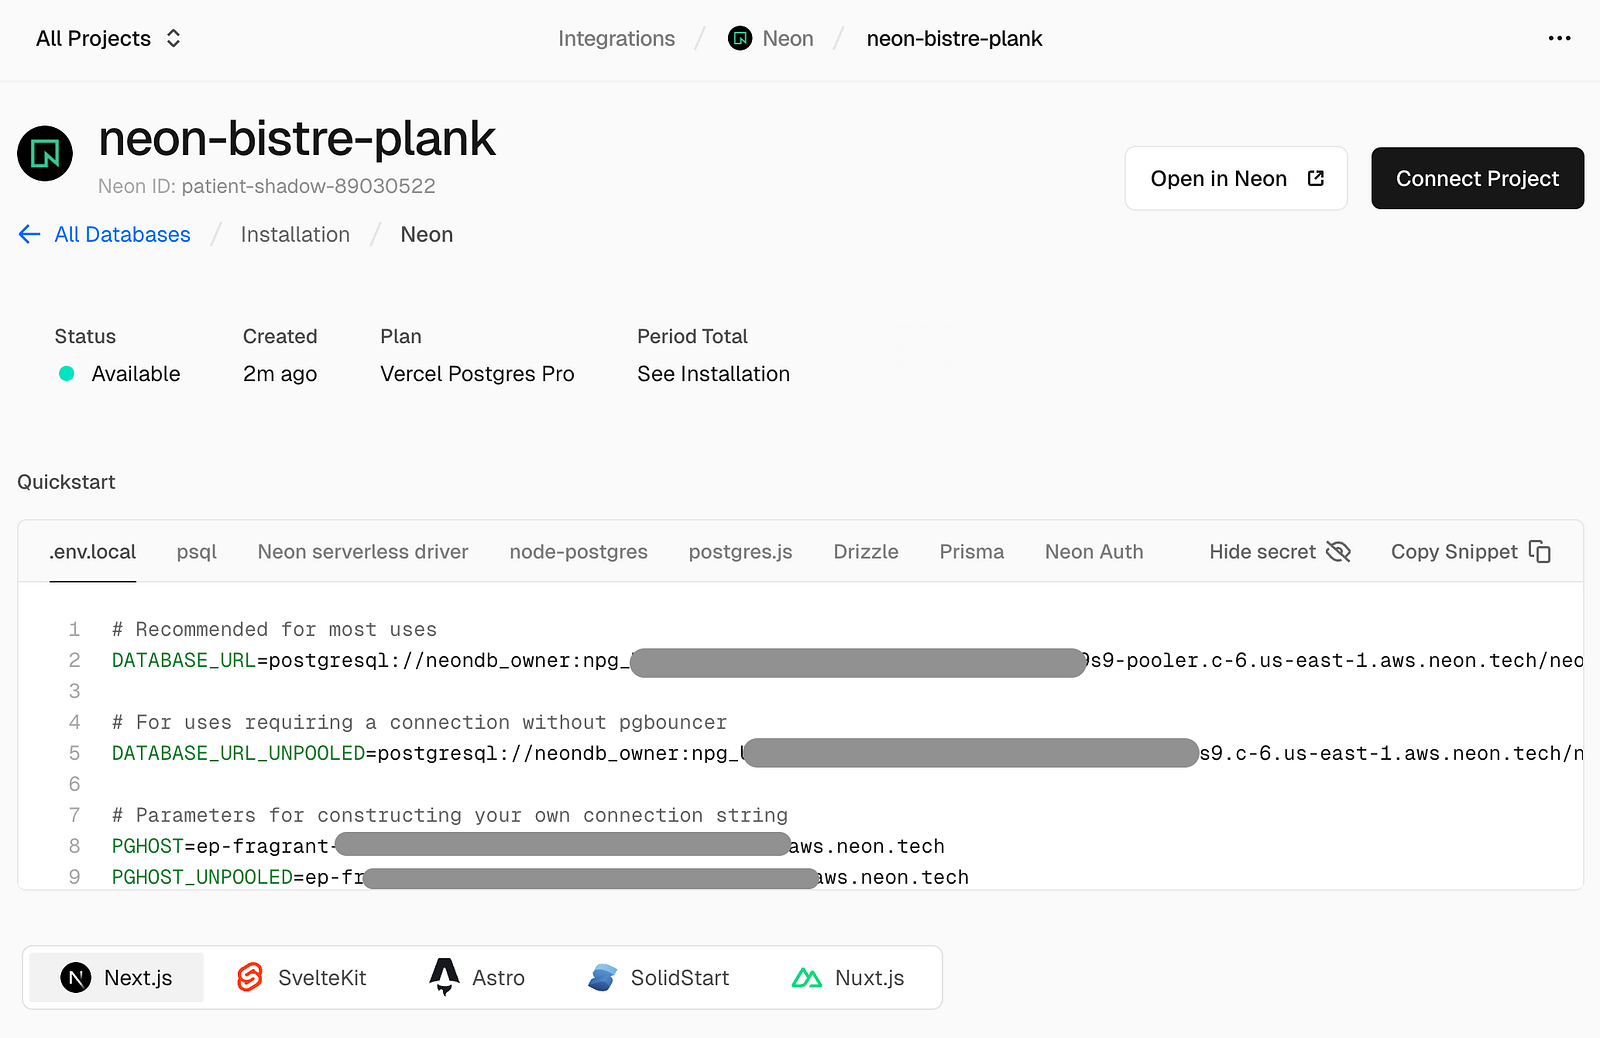
From these values, update the corresponding placeholder variables in your local .env file. The most important part here is making sure the application is using the correct database connection string.
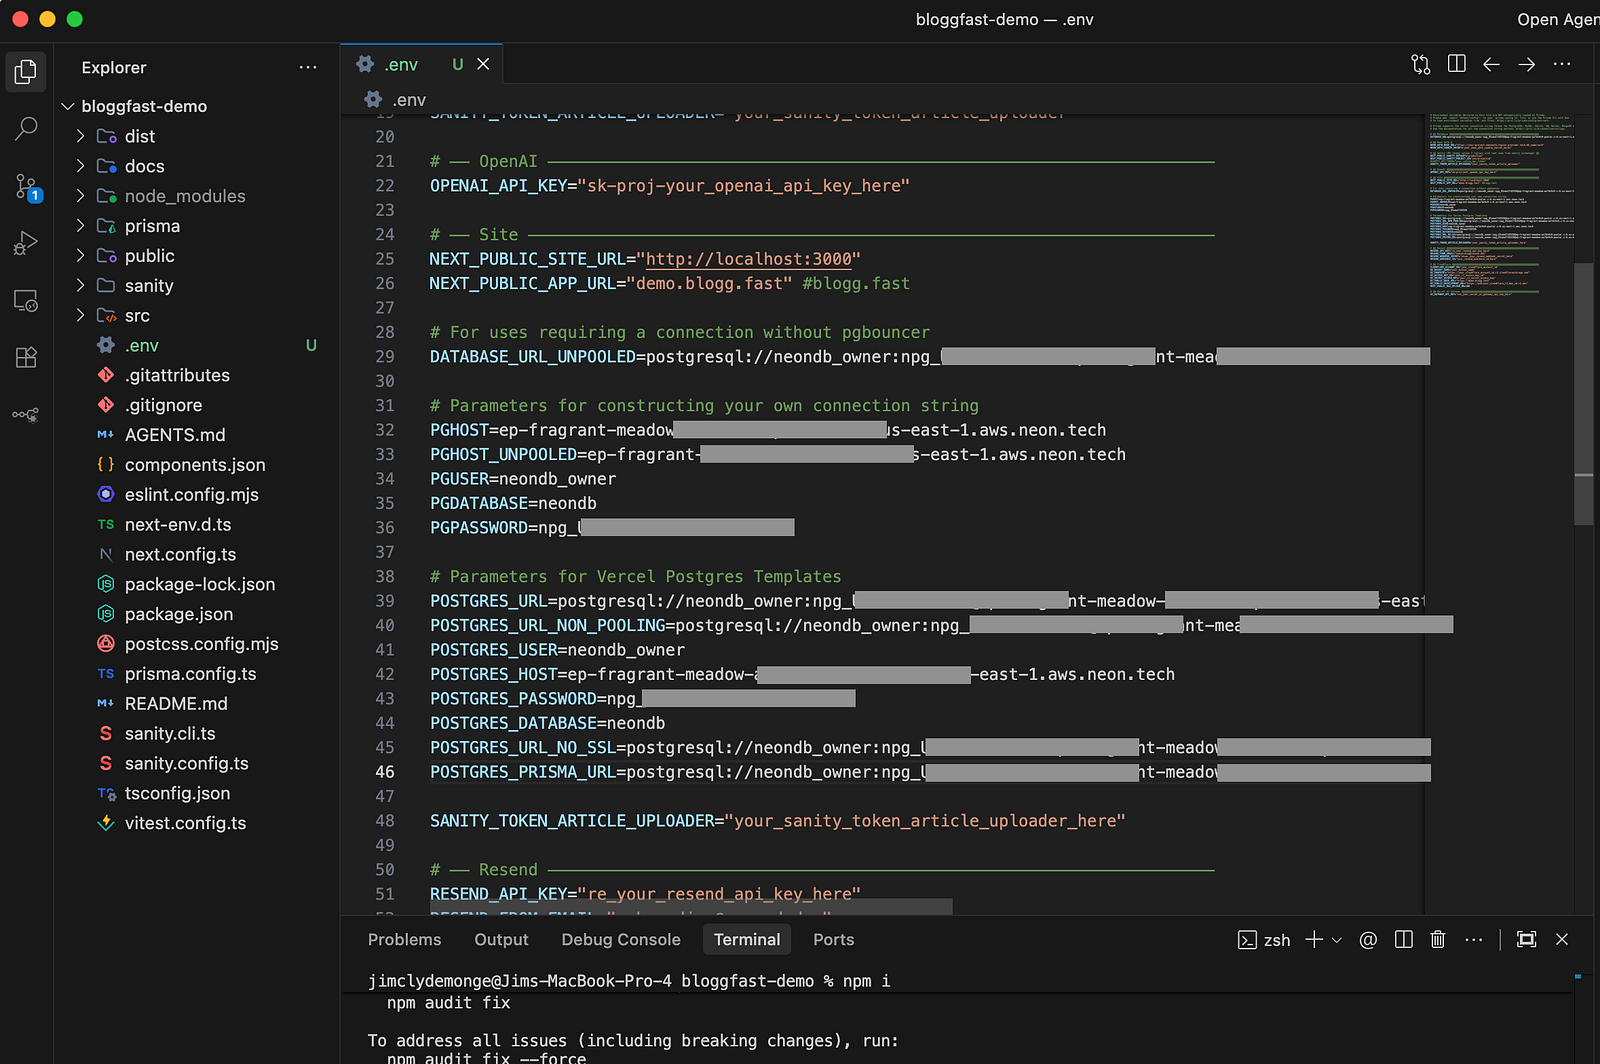
# Recommended for most uses
DATABASE_URL=postgresql://neondb_owner:npg_XXXX@ep-xxx-pooler.region.aws.neon.tech/neondb?channel_binding=require&sslmode=require

# Connection without pgbouncer (used for migrations)
DATABASE_URL_UNPOOLED=postgresql://neondb_owner:npg_XXXX@ep-xxx.region.aws.neon.tech/neondb?sslmode=require

PGHOST=ep-xxx-pooler.region.aws.neon.tech
PGHOST_UNPOOLED=ep-xxx.region.aws.neon.tech
PGUSER=neondb_owner
PGDATABASE=neondb
PGPASSWORD=npg_XXXX
Awesome. Now that the database is connected, the next step is configuring Neon Auth.
Neon Auth configuration
In the Neon project dashboard, open the Auth tab and go to the configuration page. Copy the Auth URL and paste it into your .env file as the value for NEON_AUTH_BASE_URL.
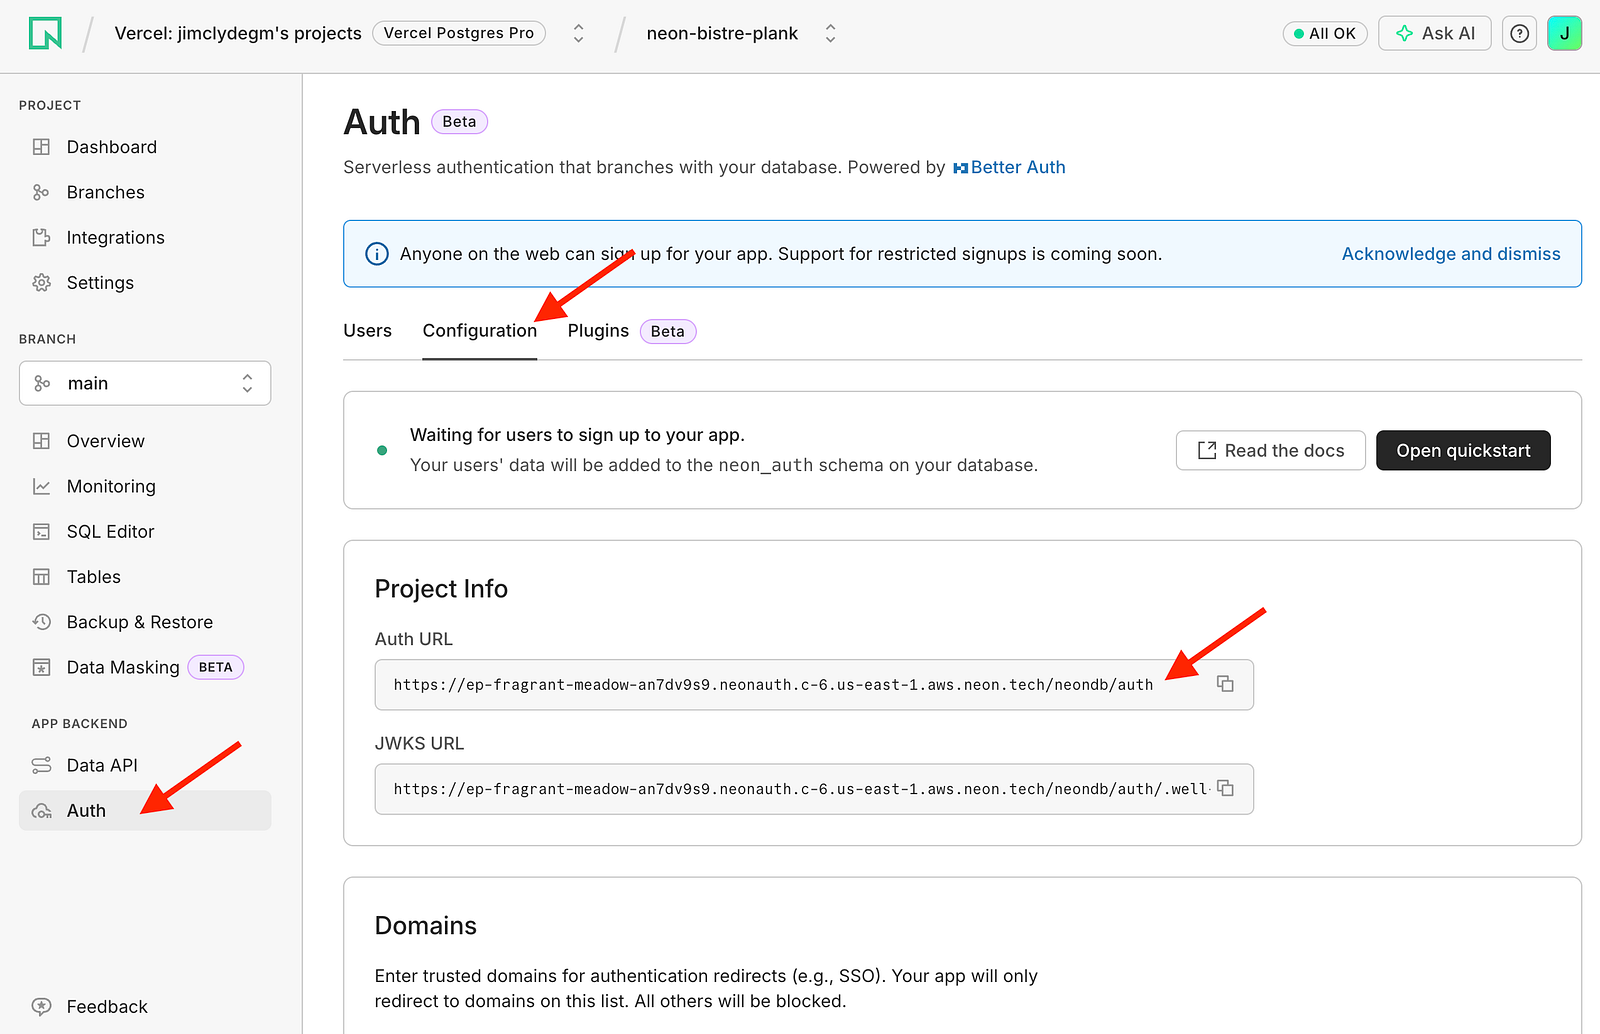
Replace the dummy value of the NEON_AUTH_BASE_URL in the .env file.
Next, create a secure value for NEON_AUTH_COOKIE_SECRET. This should be a strong random 256-bit secret. You can generate one using any secure secret generator and paste it into the environment file. I used a Secret Key Generator online tool for this.
NEON_AUTH_BASE_URL="https://ep-xxx.neonauth.region.aws.neon.tech/neondb/auth"
NEON_AUTH_COOKIE_SECRET="a-long-random-256-bit-secret"
Vercel AI Gateway
Next, configure the AI Gateway key. In your Vercel project, open the AI Gateway section and create a new API key.
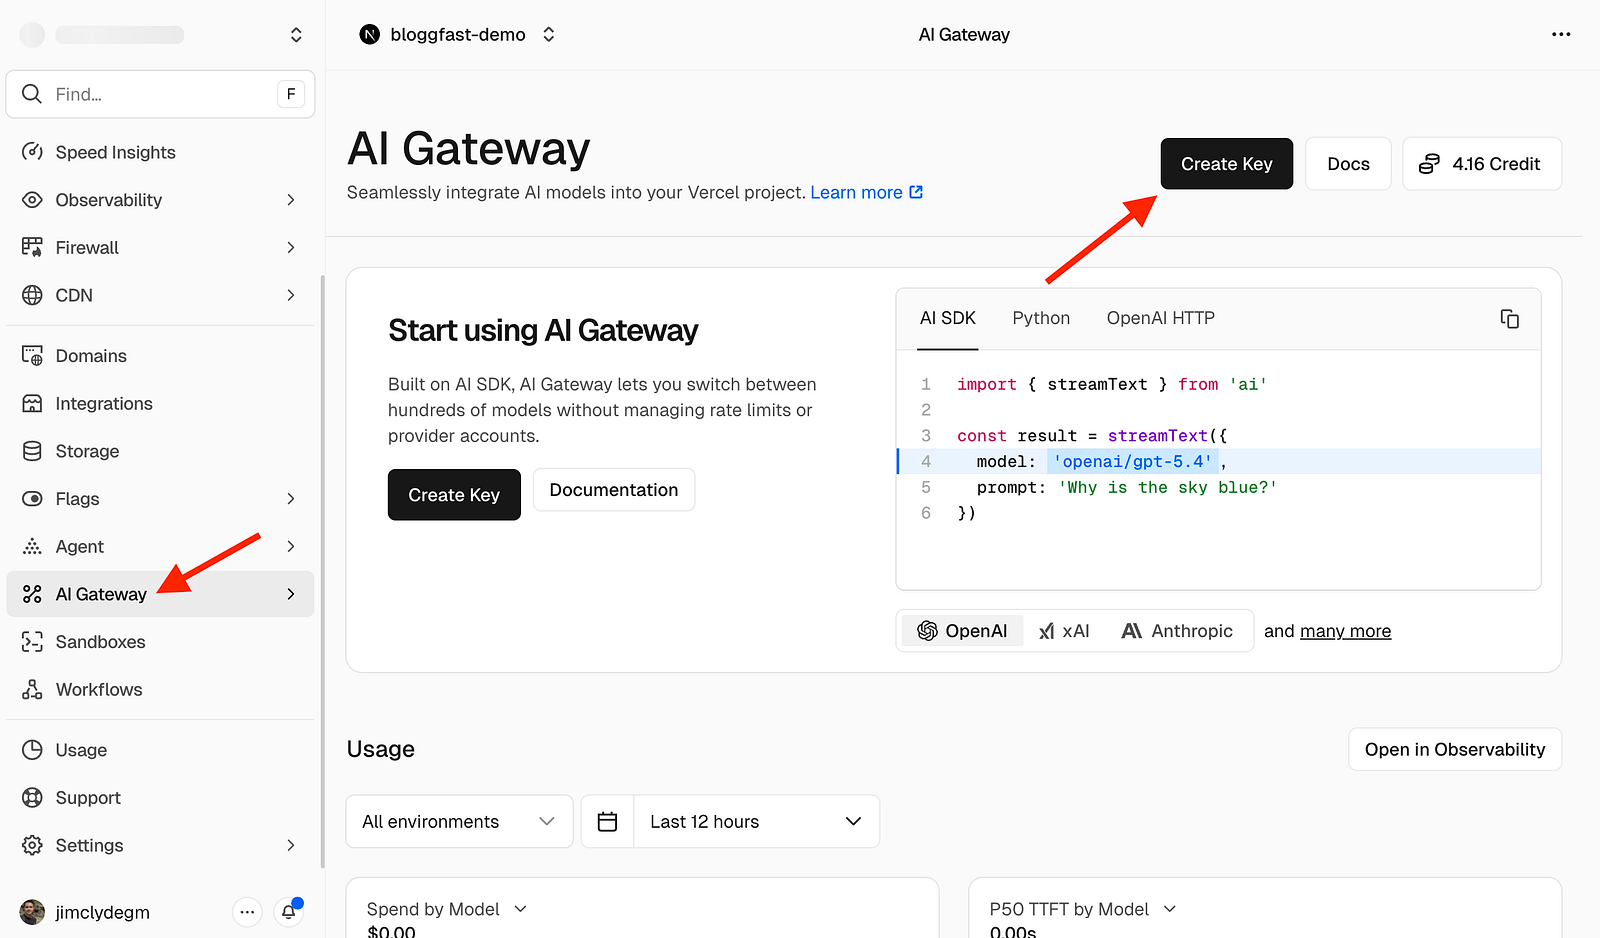
Choose a unique name that helps you identify this key and click on the generate button. Copy the API key and replace the dummy value for AI_GATEWAY_API_KEY.
This key allows BloggFast to communicate with the configured AI provider through Vercel's gateway layer. Take note also that Vercel gives you $5 of free AI Gateway credits to get you started.
AI_GATEWAY_API_KEY="vck_..."Resend email configuration
For email delivery, create a Resend account if you do not already have one. In the Resend dashboard, go to API Keys and create a new key.
Copy the key immediately and update the RESEND_API_KEY variable in your .env file.
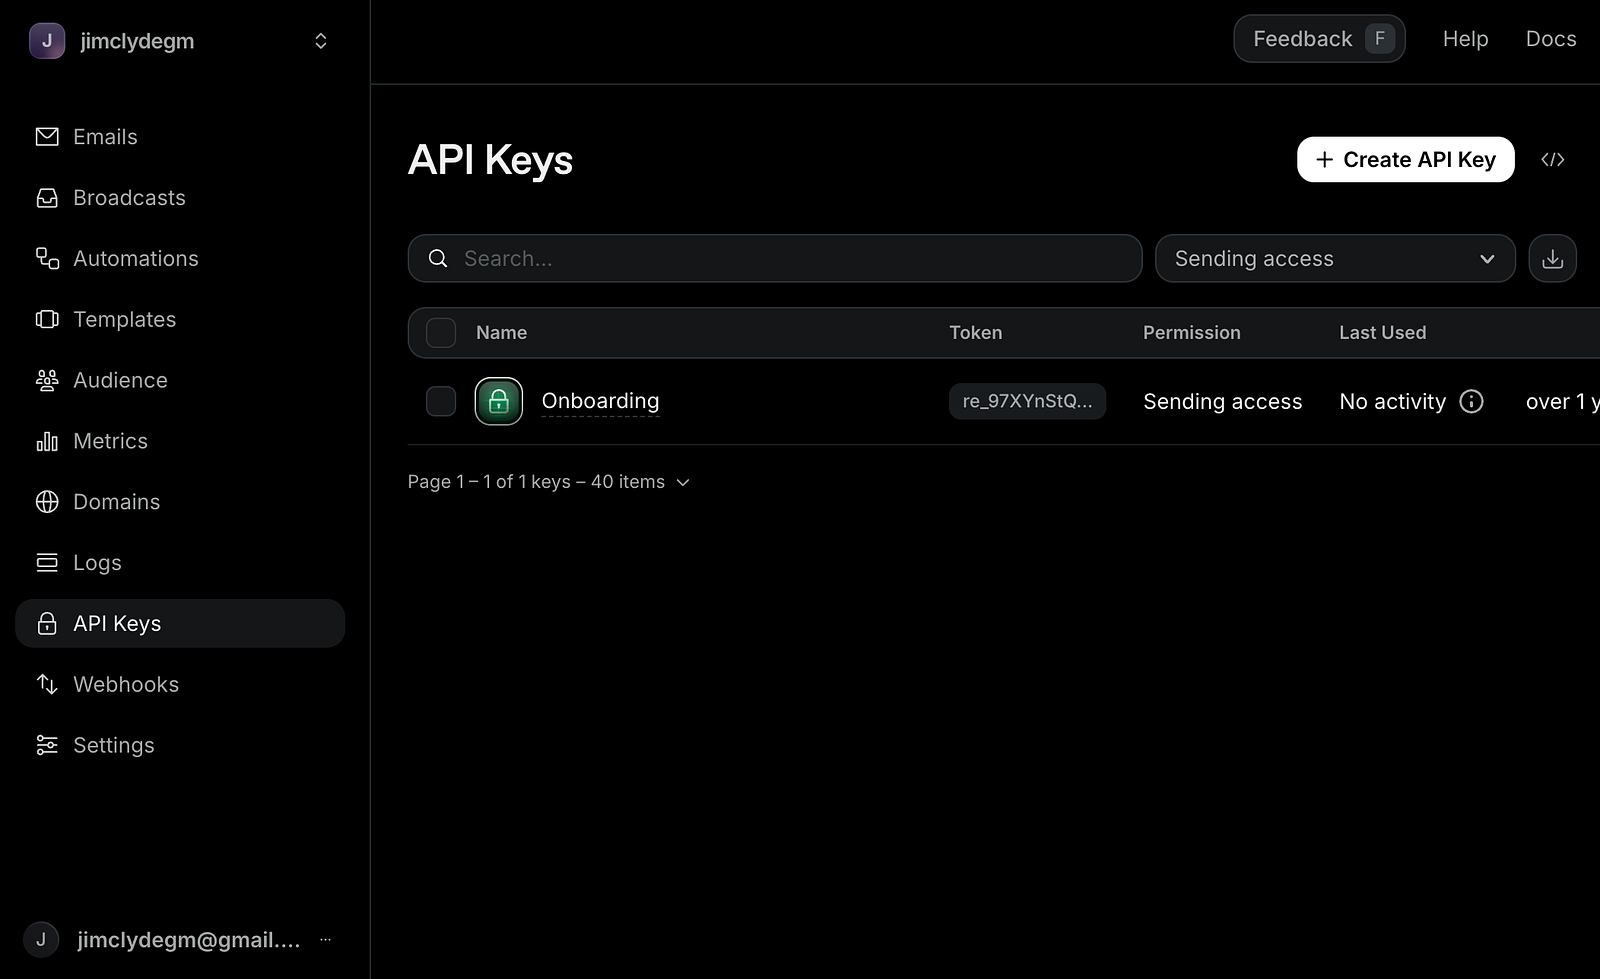
For now, you can leave RESEND_WEBHOOK_SECRET unchanged if the application has not yet been deployed to a live URL. That value is usually configured later, once the hosted app is available and can receive webhook events.
RESEND_API_KEY="re_..."
RESEND_FROM_EMAIL="onboarding@resend.dev"    # or a verified address on your domain
RESEND_WEBHOOK_SECRET="whsec_..."            # set later, once you have a live URL
Cloudflare R2 storage
BloggFast uses Cloudflare R2 for storing uploaded assets such as article images and generated media.
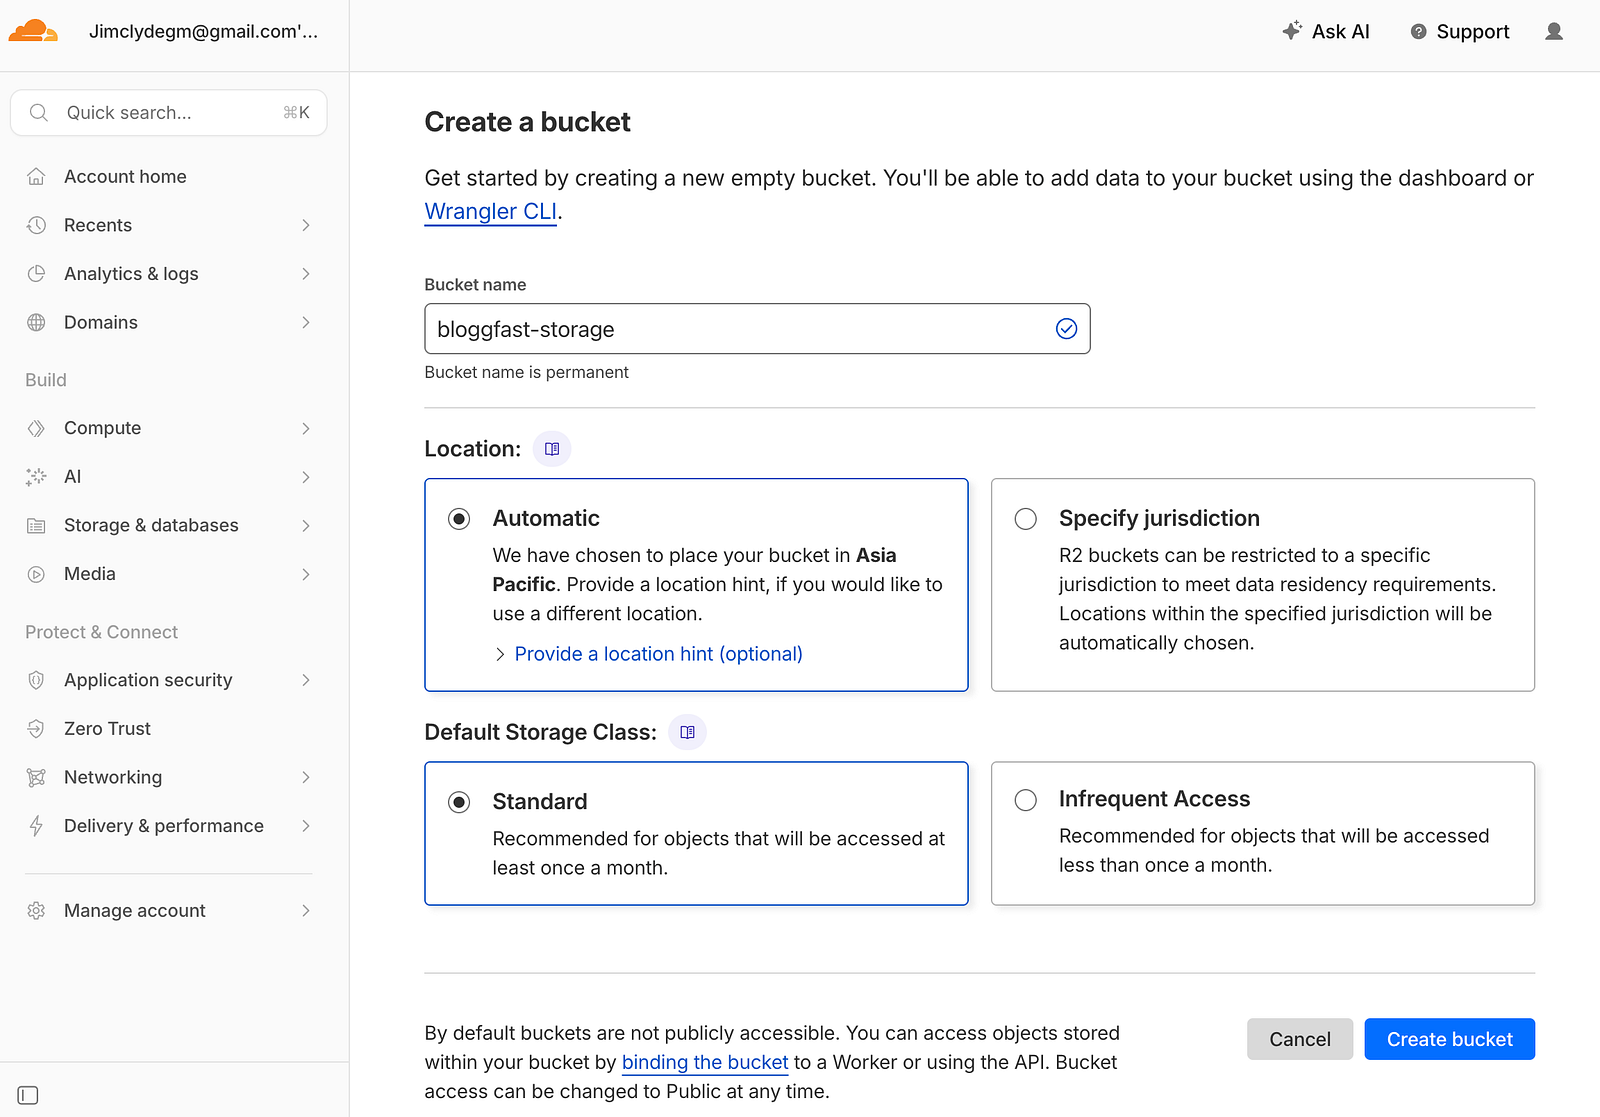
Create a Cloudflare account if needed, then open R2 Object Storage from the Storage & Databases section. Create a new bucket and choose a clear, permanent bucket name because this name will be part of your storage configuration going forward.
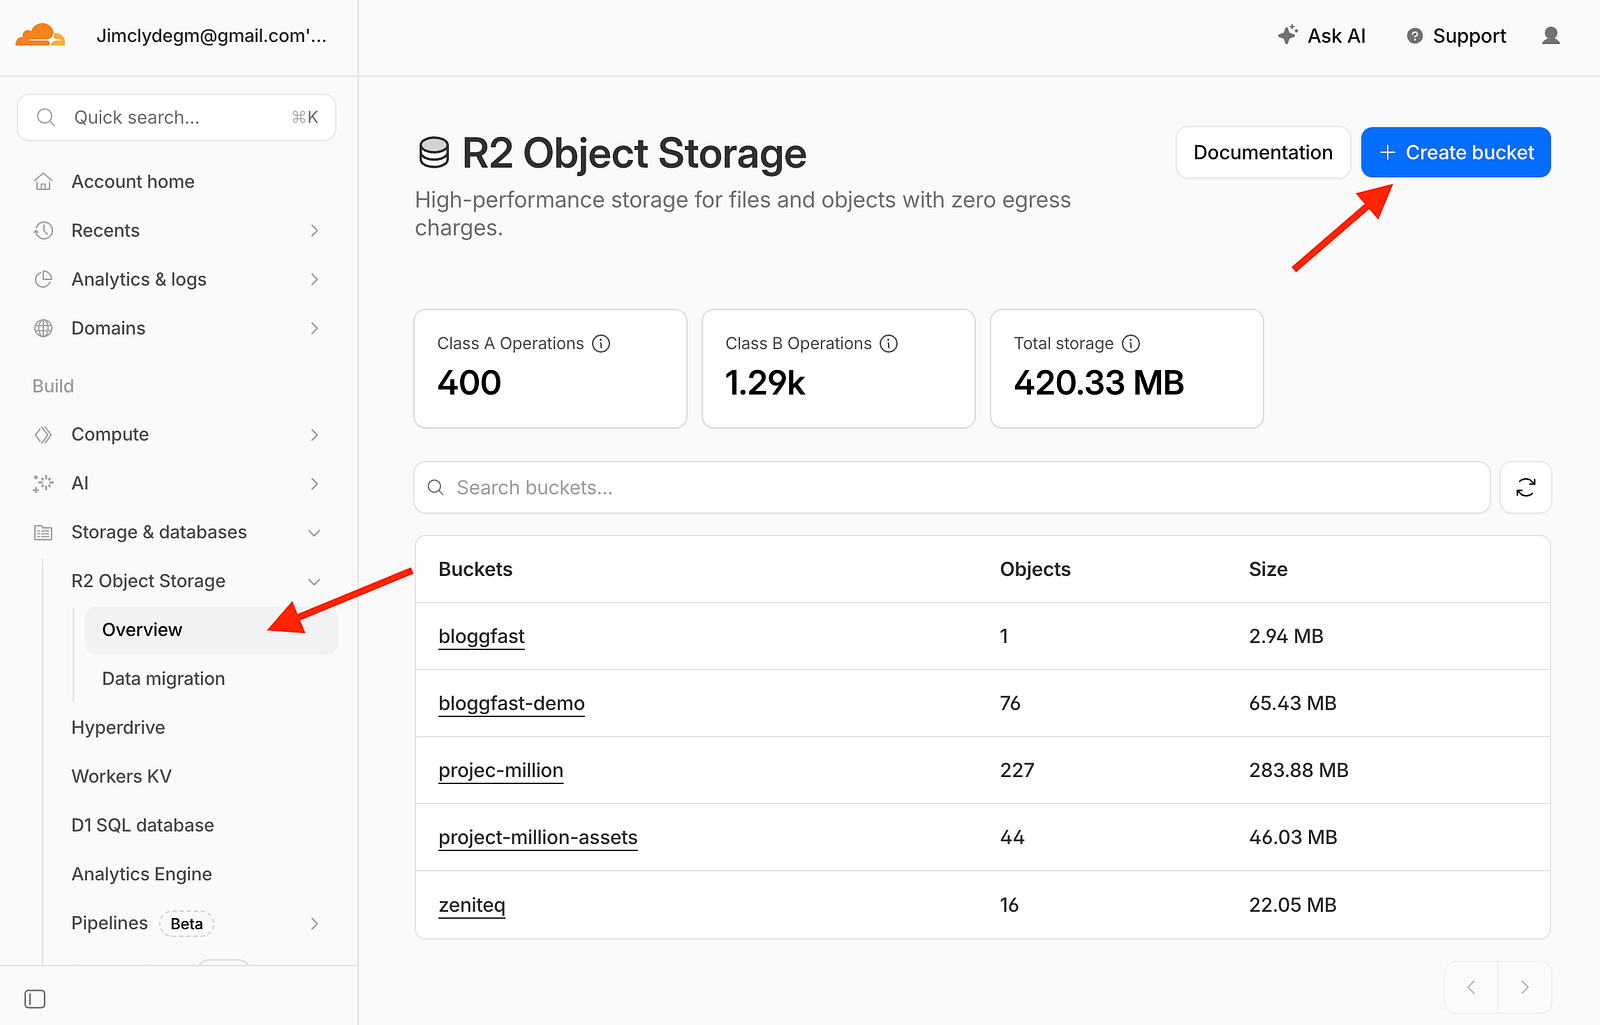
Use:
- Location: Automatic
- Default Storage Class: Standard
After the bucket is created, gather the required values for the following environment variables:
CLOUDFLARE_ACCOUNT_IDR2_BUCKET_NAMER2_ENDPOINTR2_ACCESS_KEY_IDR2_SECRET_ACCESS_KEYR2_PUBLIC_BASE_URLR2_PUBLIC_DEVELOPMENT_URLNEXT_PUBLIC_MAX_UPLOAD_MB
To get CLOUDFLARE_ACCOUNT_ID and R2_ENDPOINT, go to the R2 overview page and scroll down to Account details. Copy the Account ID and S3 API endpoint.
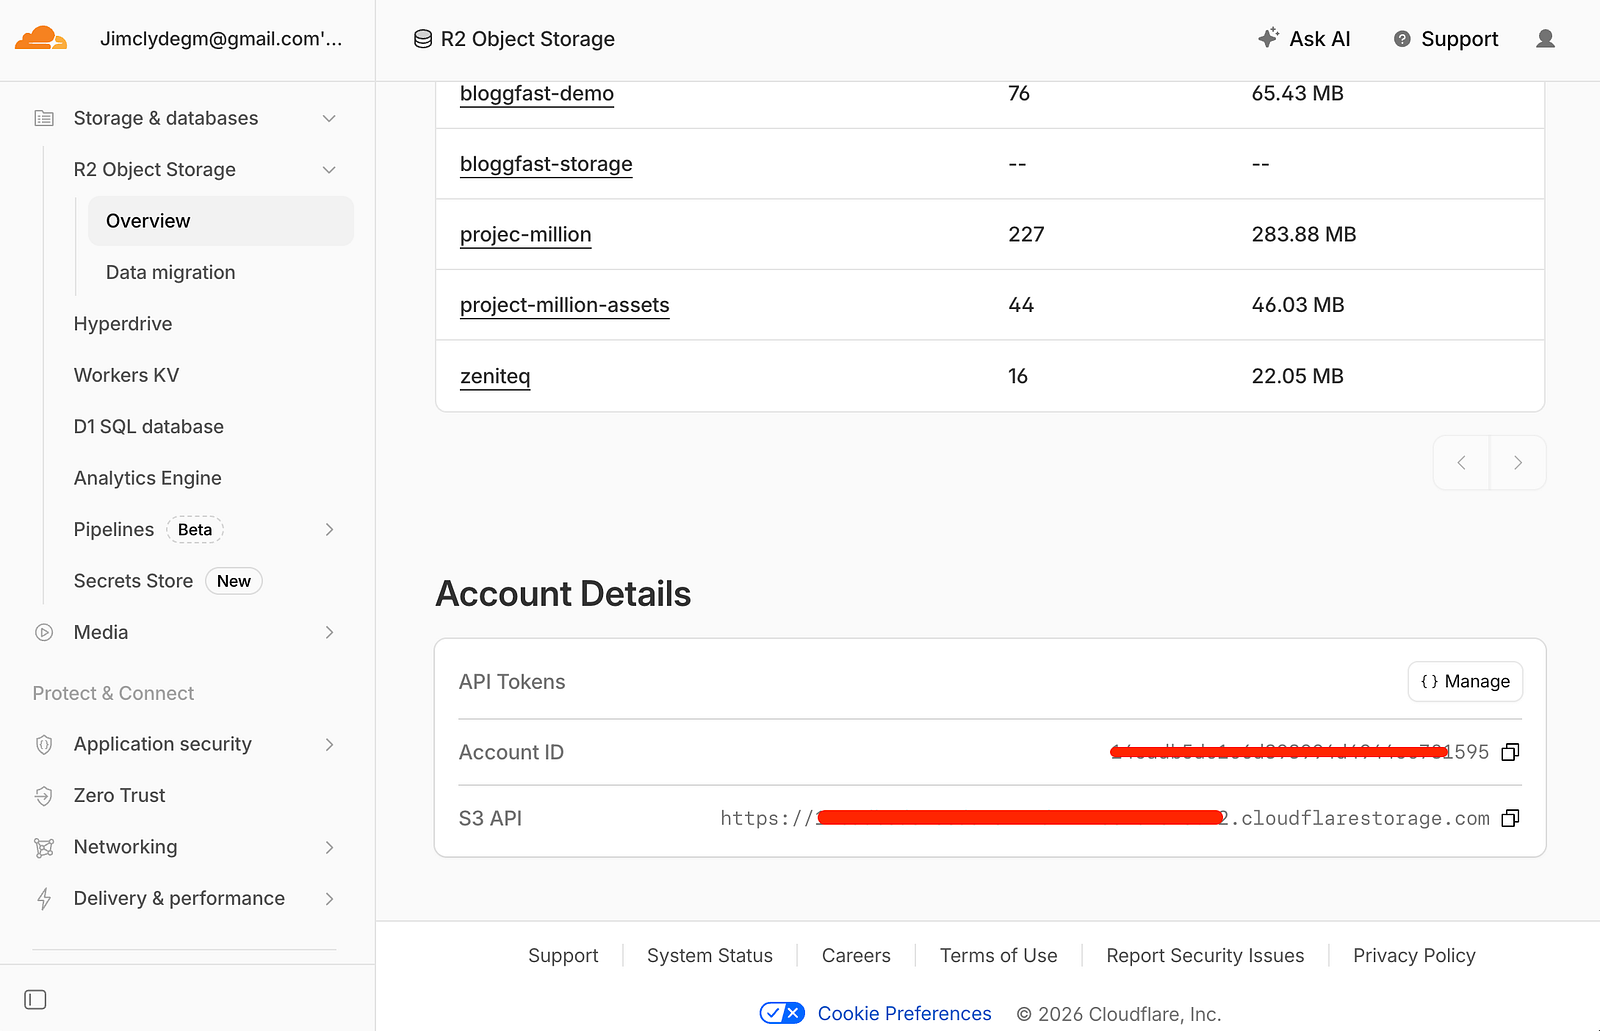
Set R2_BUCKET_NAME to the exact name of the bucket you created. In this example, I have set it to "bloggfast-storage."
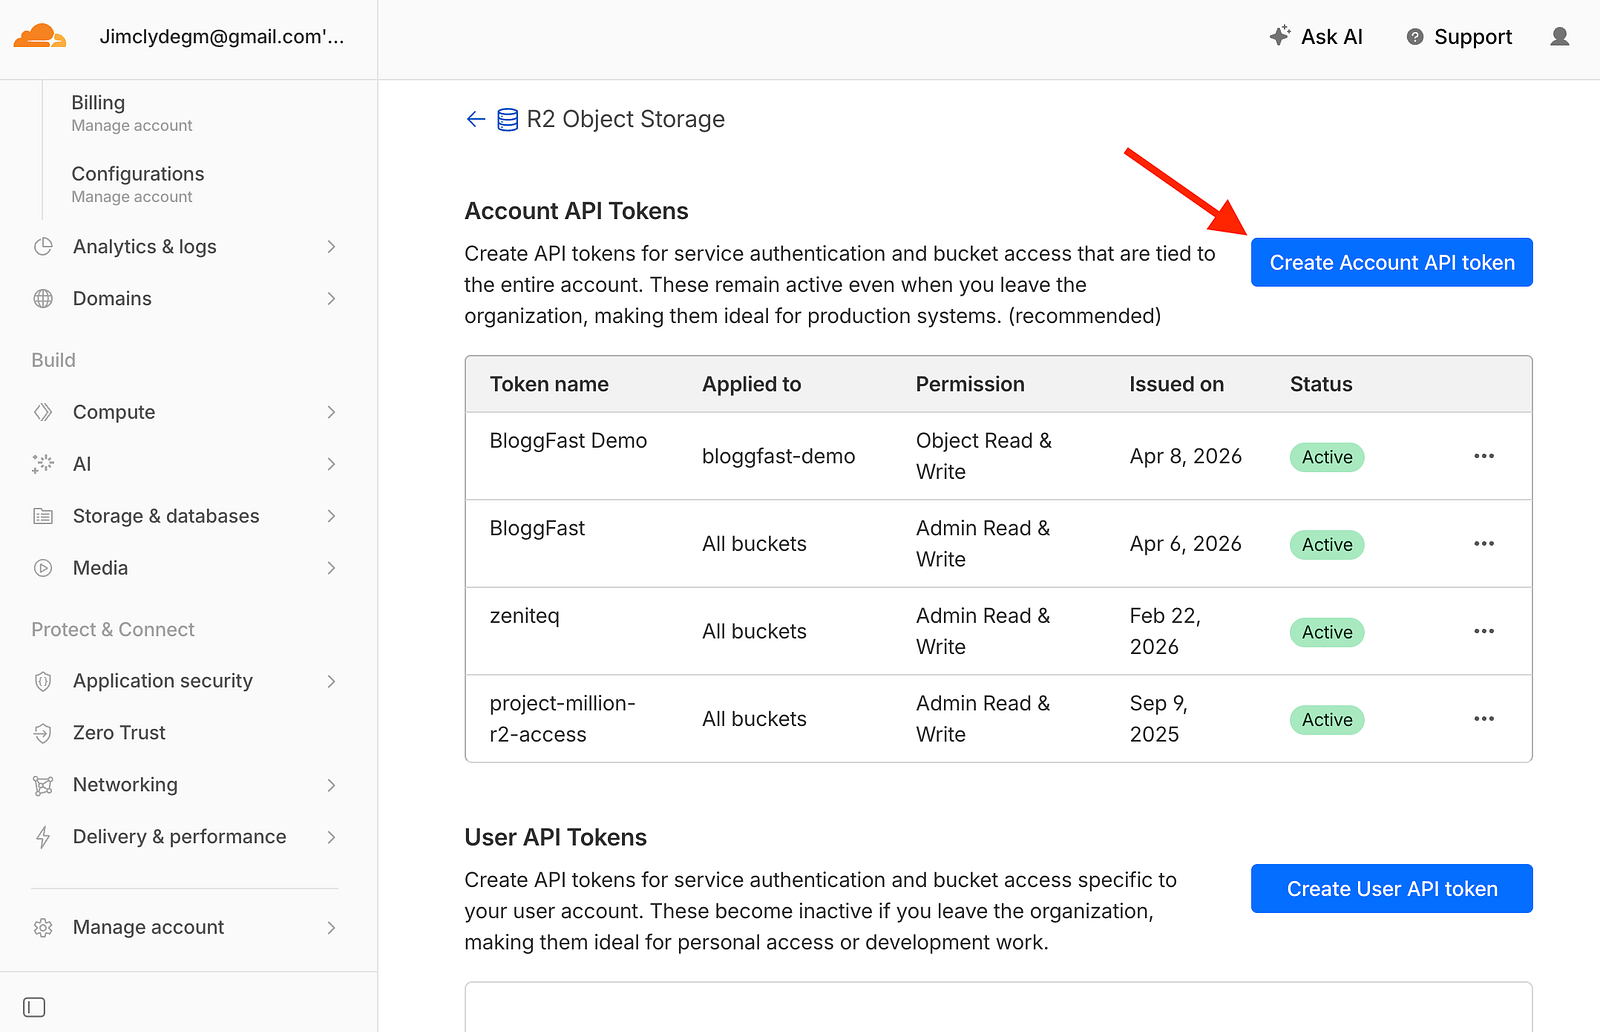
To create the R2_ACCESS_KEY_ID and the R2_SECRET_ACCESS_KEY, click on the "Manage" button for the API tokens in the same screen above. This will open the Account API Tokens menu. Create an account API token by clicking on the highlighted button below.
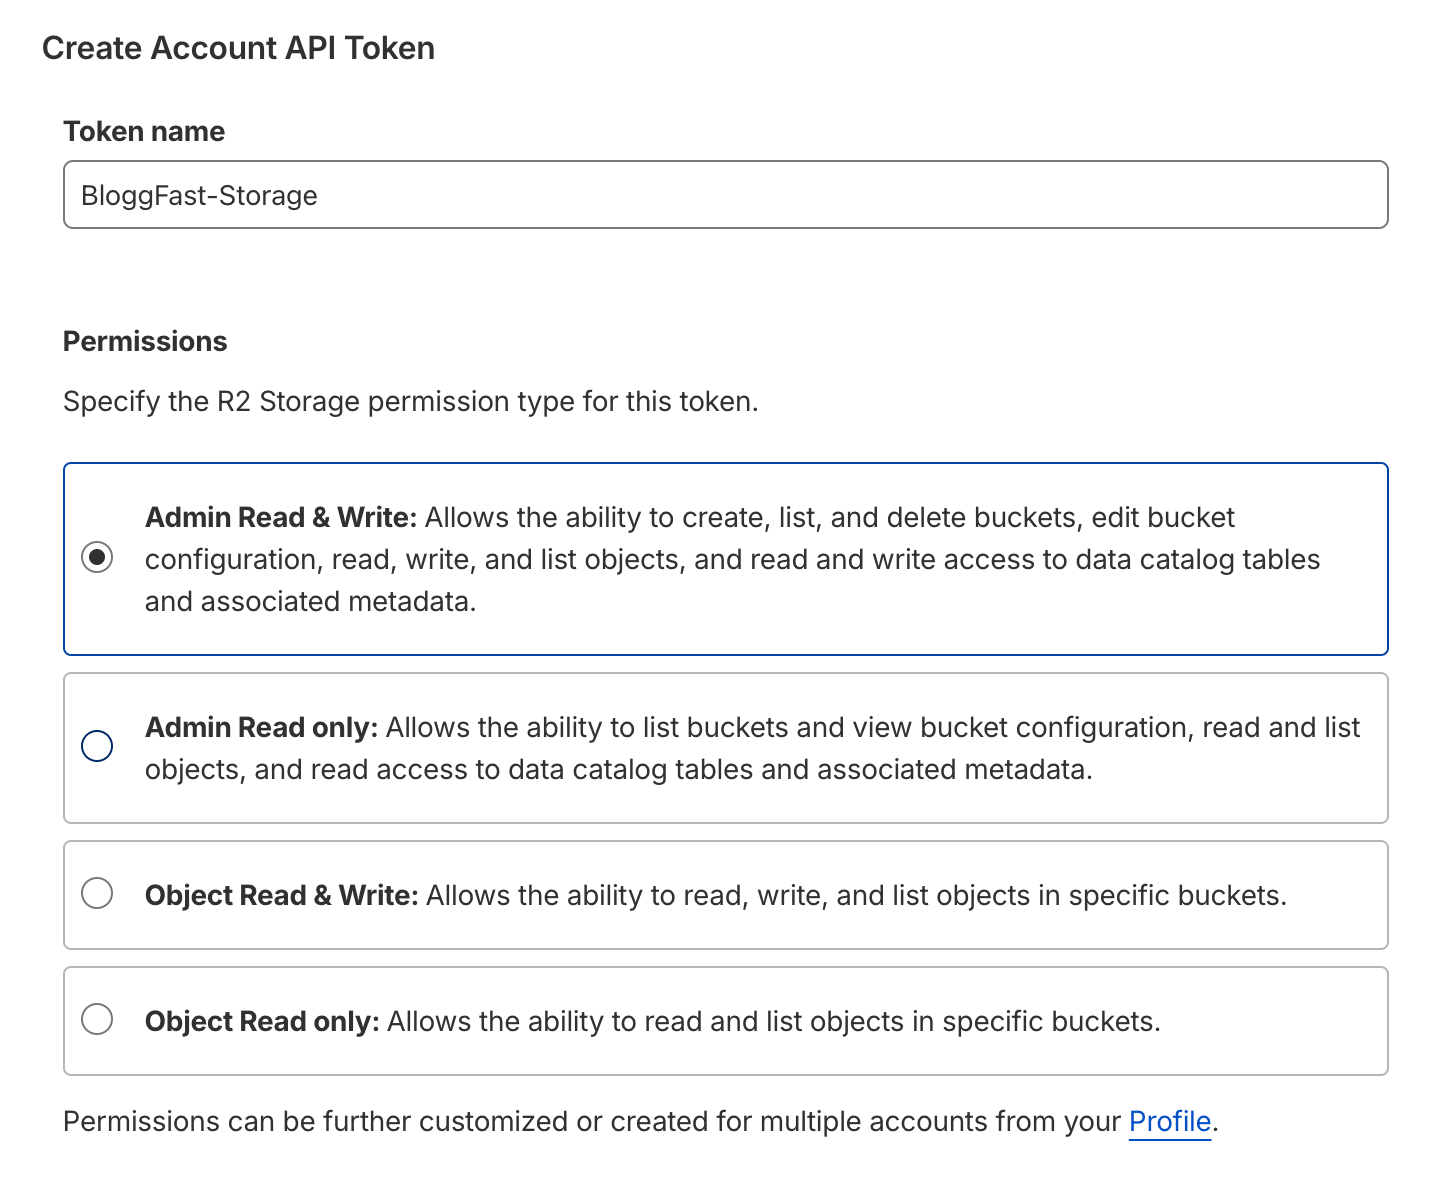
Name your token and give it "Admin Read & Write" access. Leave the rest of the settings as the default.
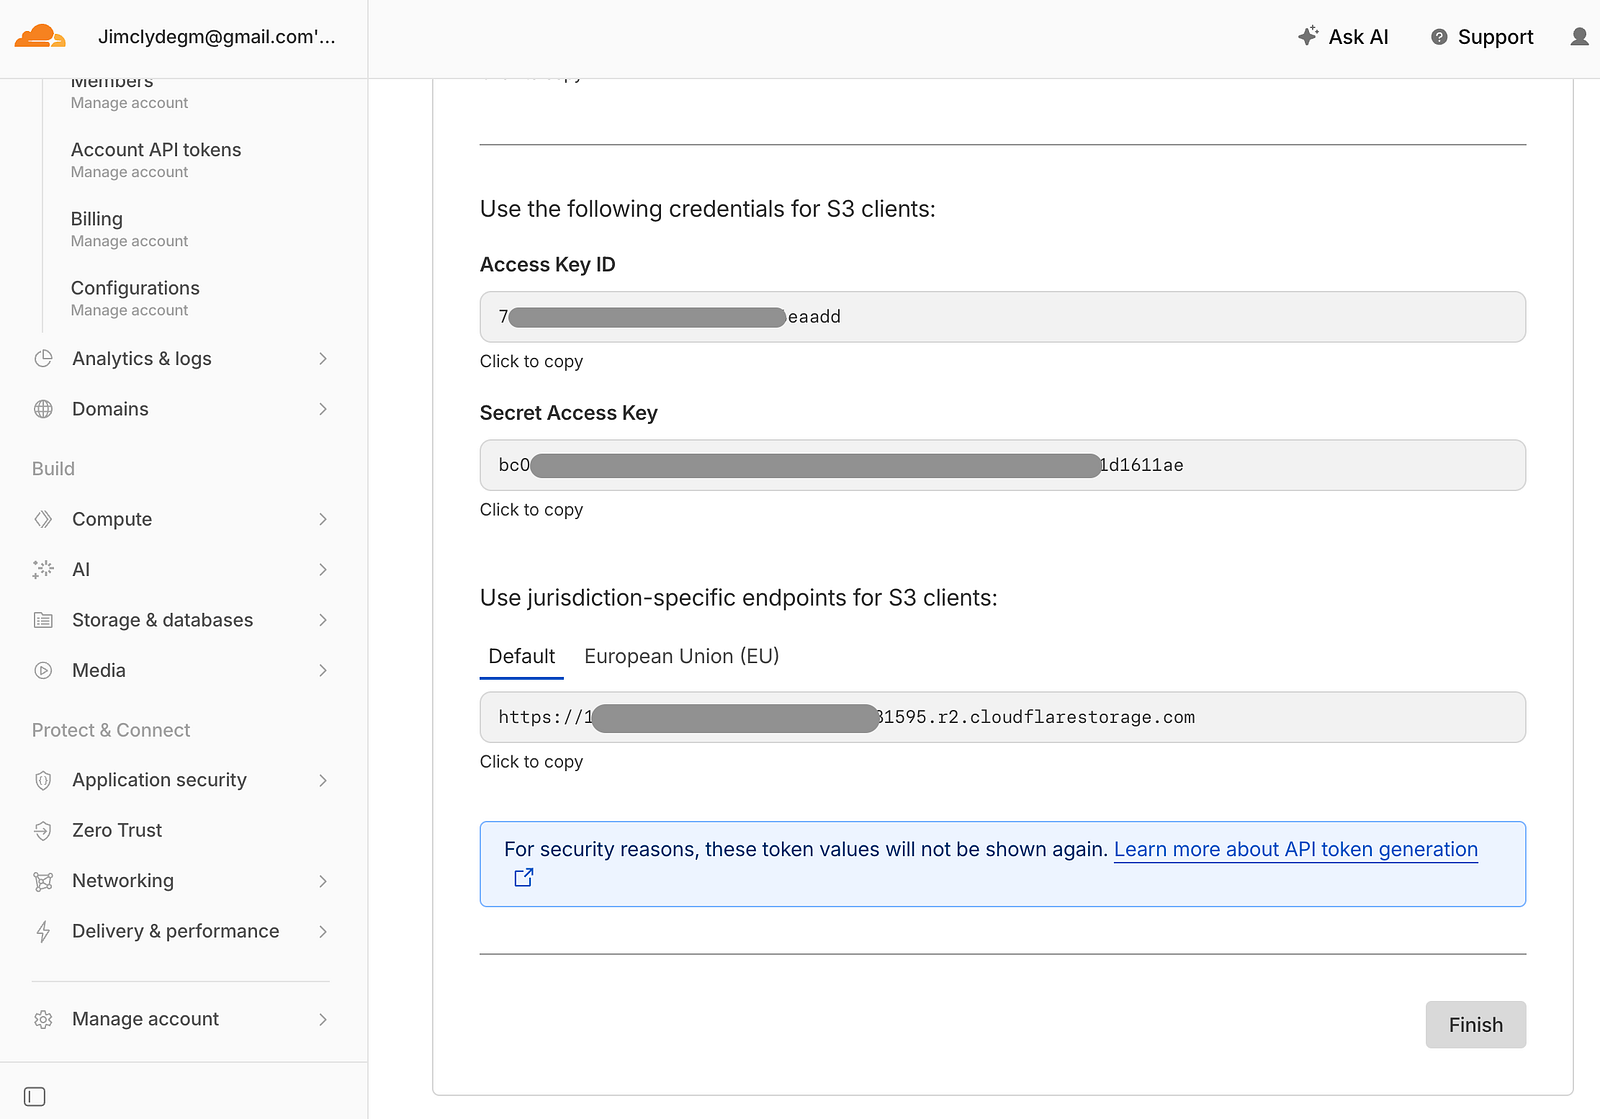
You should now have the Access Key ID and the Secret Access Key. Copy these values and replace the dummy ones in the env file.
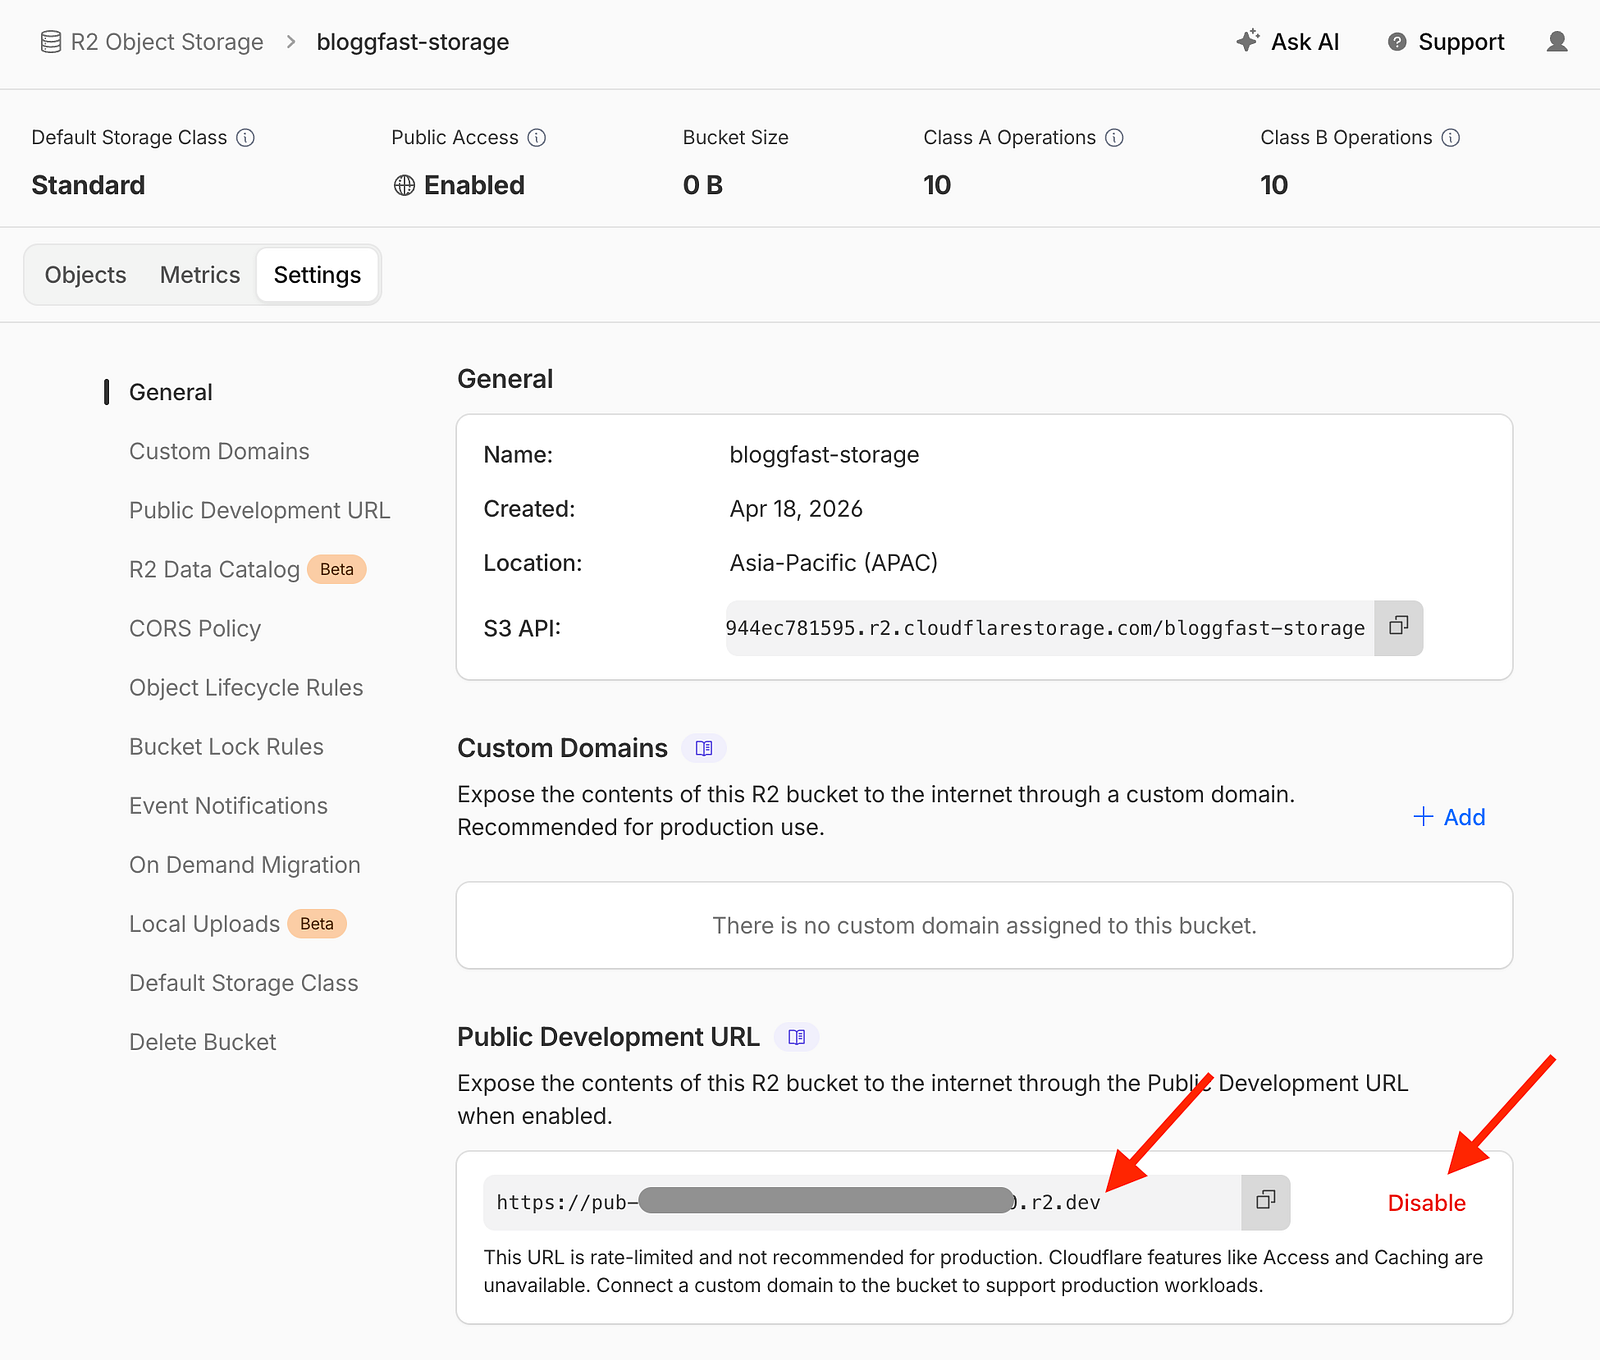
To get R2_PUBLIC_DEVELOPMENT_URL, open the bucket settings and enable the Public Development URL option. This gives you a temporary public URL that can be used during development. Copy that generated URL into the environment file.
You can leave R2_PUBLIC_BASE_URL as a placeholder until you attach a custom domain to the bucket later. Then set the NEXT_PUBLIC_MAX_UPLOAD_MB to 100. This helps prevent unexpectedly large uploads from causing issues in development or production.
CLOUDFLARE_ACCOUNT_ID="your_cloudflare_account_id"
R2_BUCKET_NAME="bloggfast-storage"
R2_ENDPOINT="https://your_account_id.r2.cloudflarestorage.com"
R2_ACCESS_KEY_ID="your_r2_access_key_id"
R2_SECRET_ACCESS_KEY="your_r2_secret_access_key"
R2_PUBLIC_BASE_URL=""
R2_PUBLIC_DEVELOPMENT_URL="https://pub-xxx.r2.dev"
NEXT_PUBLIC_MAX_UPLOAD_MB=100
Sanity set up
Let's move to the Sanity variables. Head over to Sanity, set up an account, and in the homepage, create a new project.
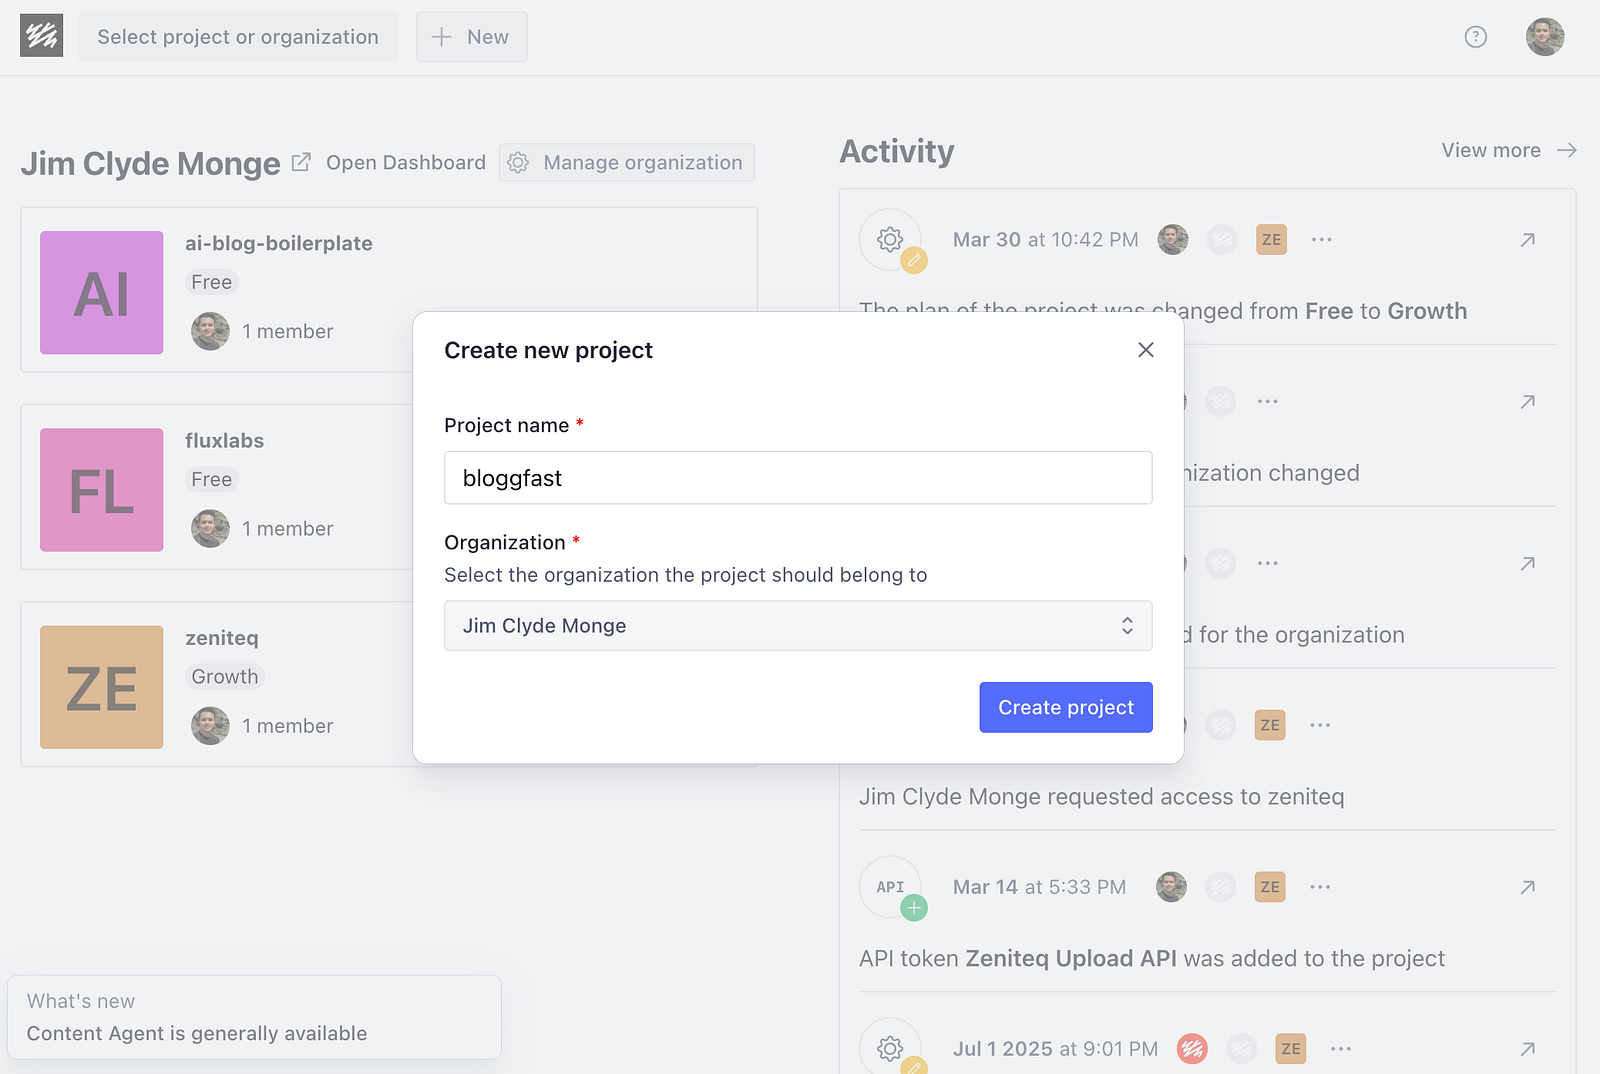
In the project overview screen, you can see the Project ID. Copy this and replace the NEXT_PUBLIC_SANITY_PROJECT_ID in the env file.
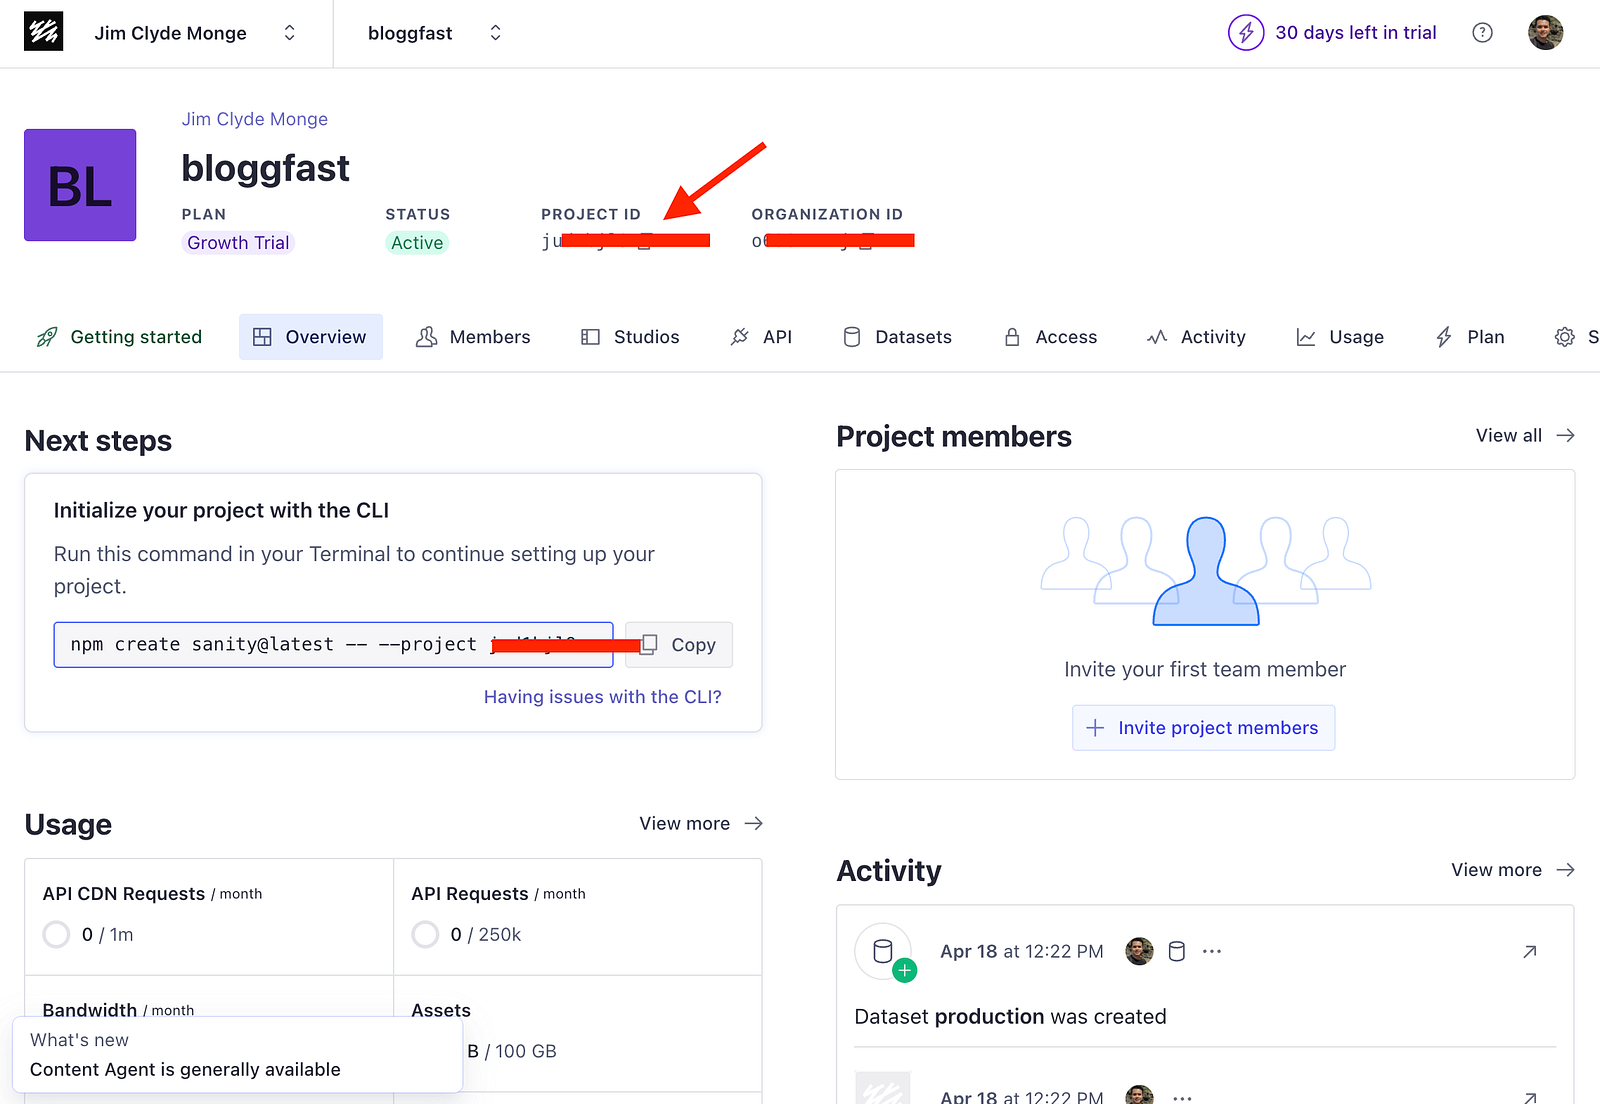
That's all you need for Sanity for now.
Sync variables to Vercel
Once your local .env file is complete, open the Vercel project dashboard and go to Settings → Environment Variables. Import or manually add the same variables there so that your Preview and Production deployments use the exact same configuration.
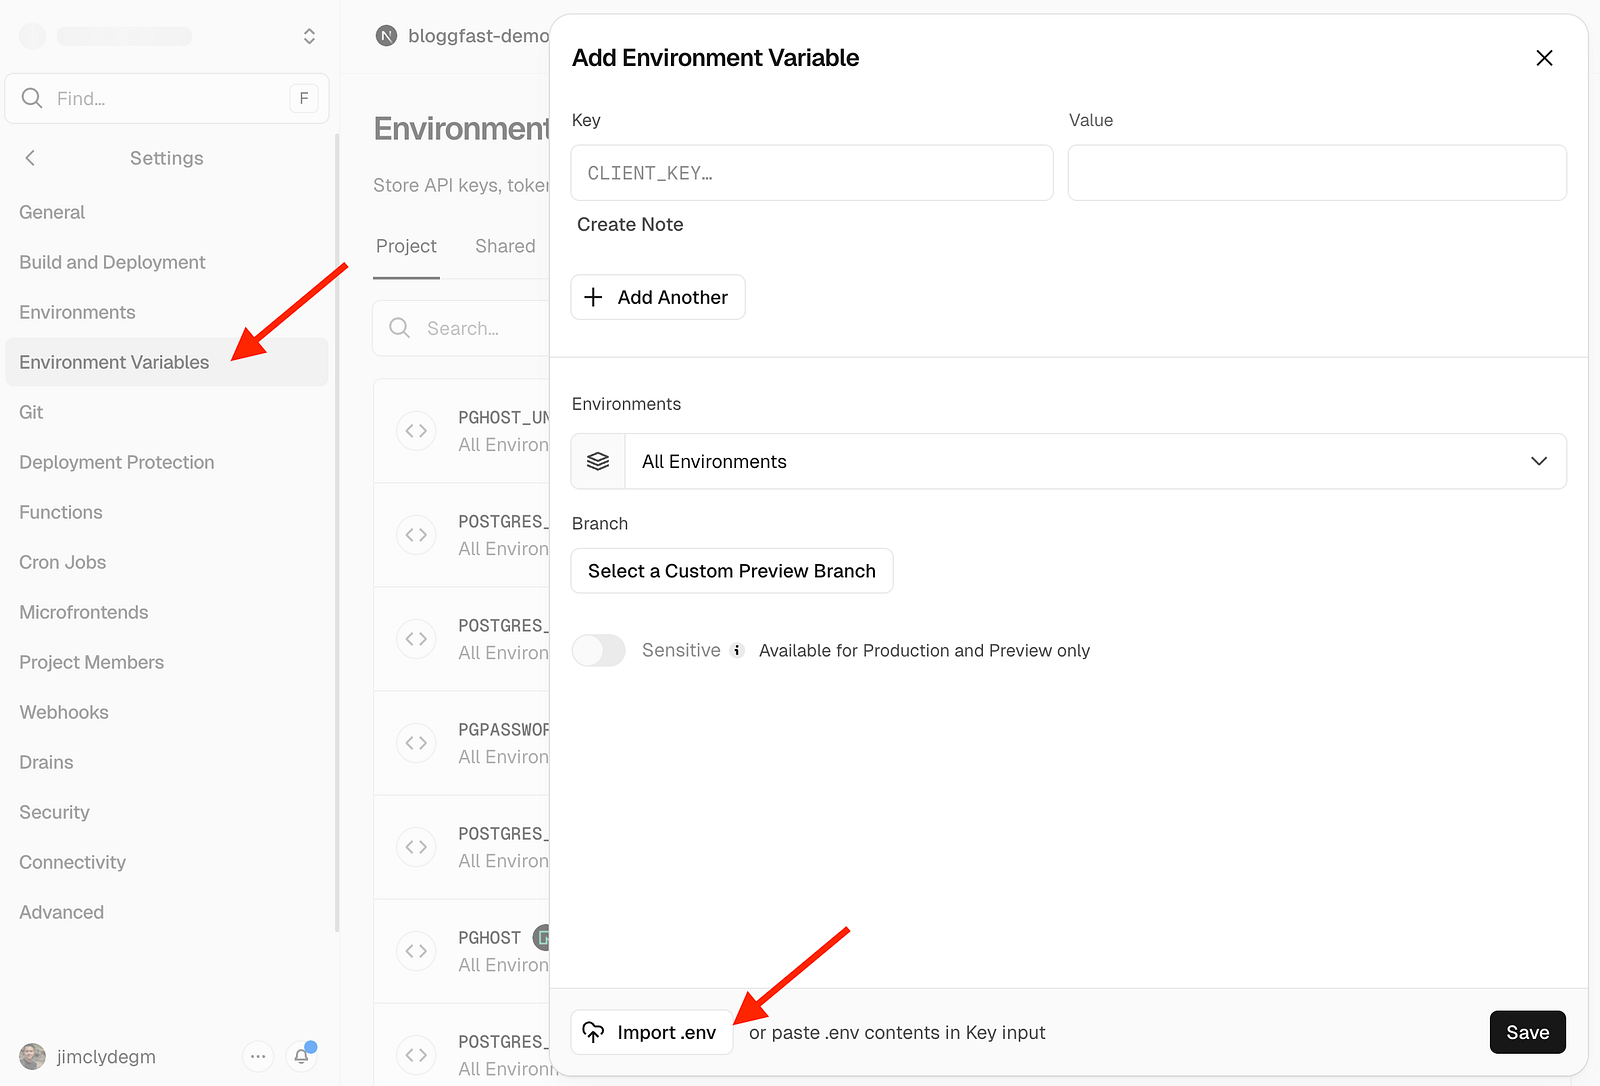
This step is important. Local environment variables only affect your machine, while Vercel deployments require the values to be stored in the project settings.
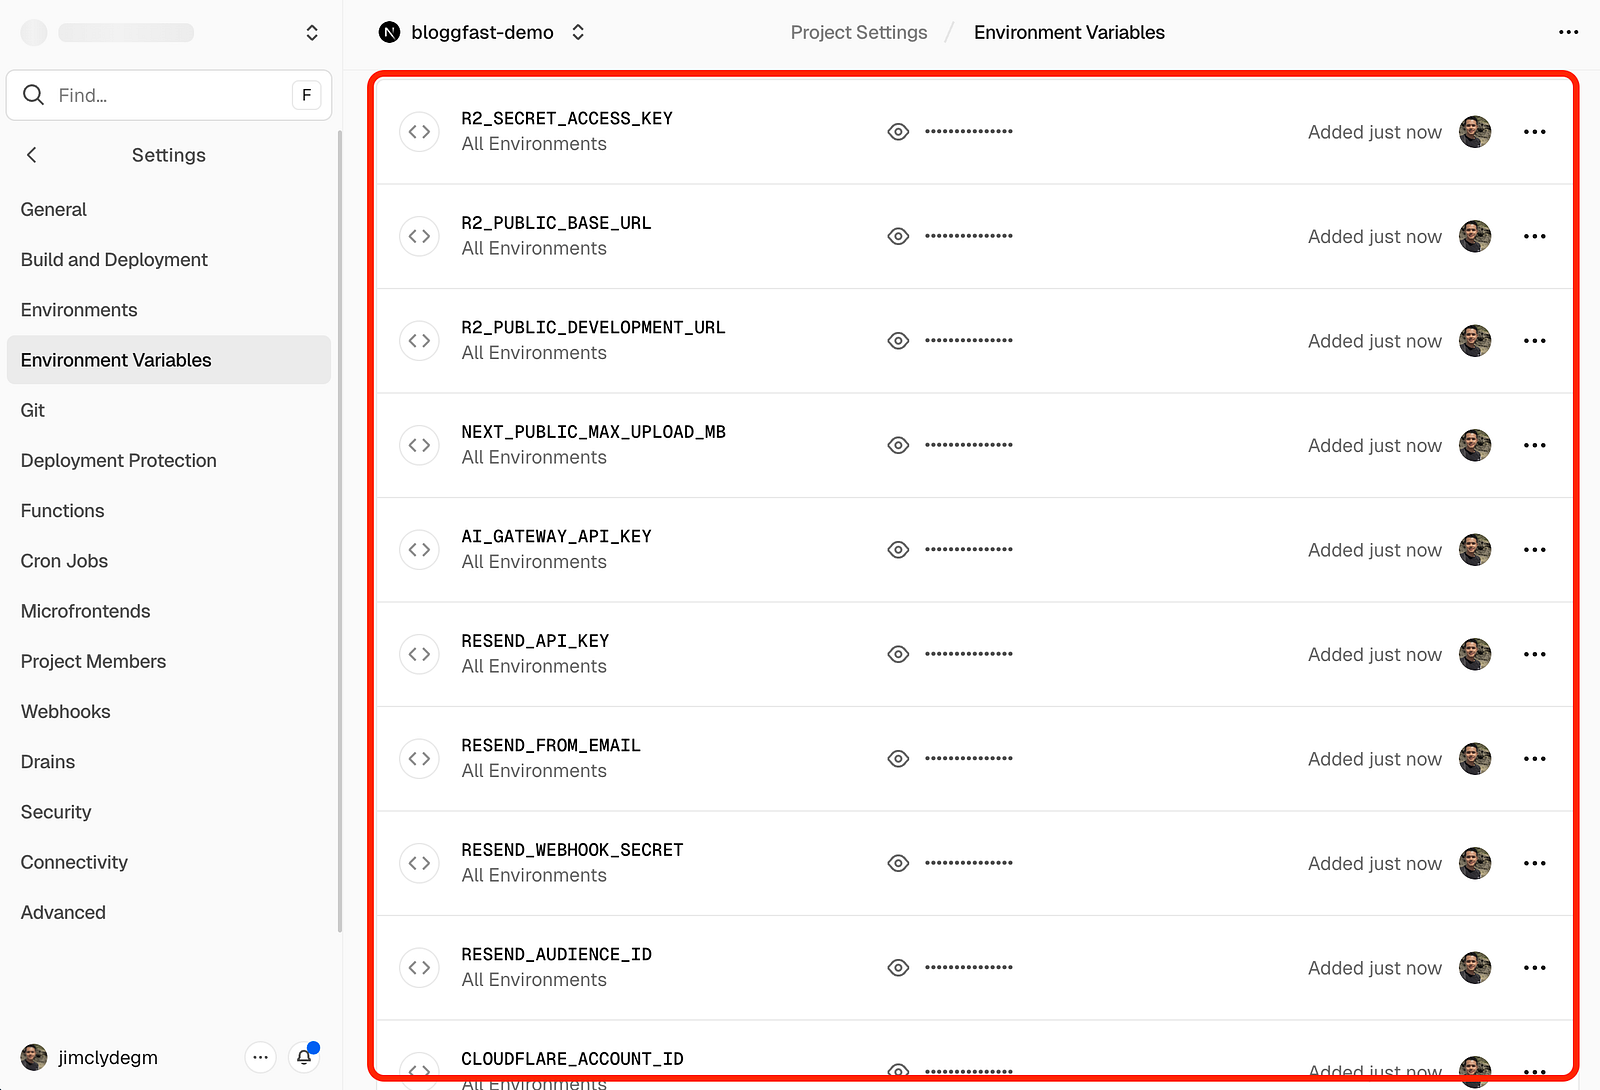
Once everything is saved, the environment setup is complete, and you are ready to initialize the database.